How to create your first MERN (MongoDB, Express JS, React JS and Node JS) Stack
Hi guys,
Do you know how to create a MERN Stack? Do you know what a MERN Stack is? Do you know when you will need a MERN Stack?
In this tutorial, I’m going to teach you how to create a simple MERN Stack Application.
First of all, a MERN Stack is a combination of four technologies: Mongo DB, Express JS, React JS, and Node JS.
OK Sam, I’d like to learn how to create my first MERN, but… what does it means?
Don’t worry, I can explain. You’re facing one of the most relevant Stacks of the world growing fast every day, acquiring many developers around the globe in a huge community. The main thing you should know is that, with MERN Stack, you’ll work with Javascript. Told this, let me explain what means each letter of this acronym.
- Mongo DB: A document-based open-source database, that provides you scalability and flexibility.
- Express JS: A structured base designed to develop web applications and APIs.
- React JS: A Javascript Front-end library for building user interfaces. Maintained by Facebook.
- Node JS: A javascript runtime built on Chrome’s V8 JS engine.
Maybe you heard about another acronym very similar to MERN, called MEAN, there is, it’s almost the same, but the difference is that we use Angular instead of React.
So, I believe the best way to learn everything is by doing a practical example, that means for our case we’re going to create a cinema’s movies CRUD (Create, Read, Update and Delete) form.
1. Setting up the Backend
Here, we’re going to create the server-side of our application, where we’re going to create a RESTful following the steps.
Firstly, let’s create an empty directory that will be the root of our system.
$ mkdir movies-app
$ cd movies-app
After this, let’s create another empty folder called a server that will be our backend folder.
$ mkdir server
$ cd server
Here, we’ll create our package.json.
Will we create what? Sam, what’s a package.json?
The package.json file is just a manifest for your Node.js project, it contains the metadata of it. You can manage the dependencies of your project and make scripts that will help you to install dependencies, generate builds, run tests, and other things.
To create a package.json you need a Package Manager, you can choose NPM (Node Package Manager) or YARN. Feel free to use what you prefer.
So, let’s create our file.
$ yarn initor$ npm init -y
You’ll be asked questions related to your project. If you’d like to keep the default provided by NPM or YARN, you can just type enter until the end.
After that, you can find the file in the server folder.
$ ls
package.json
With this file, we’re able to install our dependencies.
$ yarn add express body-parser cors mongoose nodemonor$ npm install express body-parser cors mongoose nodemon
Hey Sam, take it easy, what do these names means?
Slowly little grasshopper.
- Express: It’s the server framework (The E in MERN).
- Body Parser: Responsible to get the body off of network requests.
- Nodemon: Restart the server when it sees changes (for a better dev experience).
- Cors: Package for providing a Connect/Express middleware that can be used to enable CORS with various options.
- Mongoose: It’s an elegant MongoDB object modeling for node.js
Now you know the basic dependencies that we need at the moment.
If you list the server folder you’ll note that something changes.
$ls
node_modules package.json yarn.lock
Look at the new folder node_modules and the new file yarn.lock (if you use NPM the file is package-lock.json). With these two files, your project can be interpreted.
We can create our first NodeJS file.
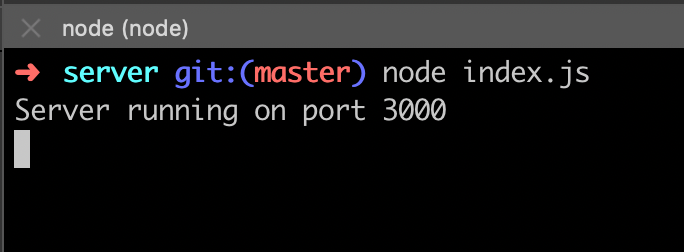
To start the application you just need to do:
$ node index.jsIf you can see the message “Server running on port 3000” it means that everything you’ve done until now it’s correct.
You can open a browser and type localhost:3000, you’ll see the message “Hello World”.
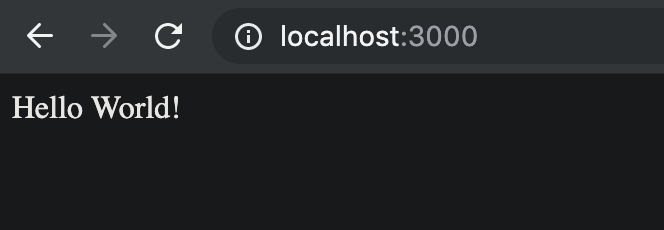
Awesome!!! You’re able to see your server running.
1.1. Installing MongoDB
For now, we need to install MongoDB. For this, just type on your terminal:
$ brew tap mongodb/brew
$ brew install mongodb-community
$ brew services start mongodb-communityIf you have a previous version of mongodb$ brew services stop mongodb
$ brew uninstall mongodb$ brew tap mongodb/brew
$ brew install mongodb-community
$ brew services start mongodb-community
Hey Sam, I don’t use Mac, my OS is Linux (or Windows). What I should do?
This is a very simple case, you can just follow the step on this link provided by MongoDB.
Having MongoDB installed, you need to create the directory where you’re going to store the data.
$ mkdir -p /data/dbTo execute MongoDB as a service:
$ brew services start mongodbNice! The next step is creating our database that we call it: cinema.
$ mongo
> use cinema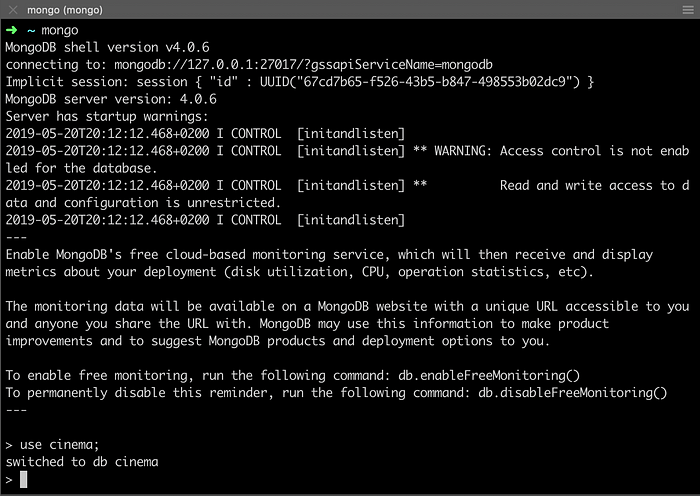
And that’s it, we’ve just created our database with these commands. Easy peasy.
Coming back to our javascript code, we need to create a connection from our server using the Mongoose library.
Let’s create a new directory called DB (inside server folder) and a new file called index.js inside of it.
$ mkdir db
$ touch index.js
Updating the main file server/index.js we have something like this.
If you take a look at your terminal, you see that nothing changed. This is because when you type node index.js that means node keeps the last set up before it started. If you’d like to restart the application you need to close and open a new one. However, at the beginning of this tutorial, I told you about nodemon, it’s going to restart the server whenever it sees changes in any file of our project. From, now let’s do this.
$ nodemon index.js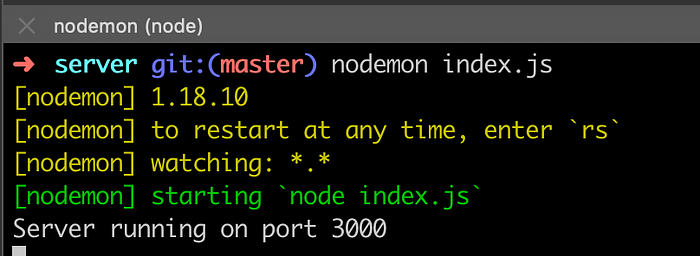
1.1.1. Creating Movie’s Schema
As we’ve said, we need to create an entity called movies that should be composed of the movies of a cinema. For this, we just need to know the name of the movie and the times the movie is passing on the cinema, and to add an important, but not necessary information, the rating.
Let’s create a folder called models and add a file called movie-model.js.
$ mkdir models
$ cd models
$ touch movie-model.js
1.2. Creating routes
Here, we’ll create all the CRUD operations and create our REST endpoints. Let’s create two more folders on the server: routes and controllers. In the route folder, let’s create the file movie-router.js and in the controller folder, movie-ctrl.js.
$ mkdir routes controllers
$ touch routes/movie-router.js
$ touch controllers/movie-ctrl.js
Lastly, let’s add the router in our server/index.js file.
1.3. Testing manually our application
To test our application I’d like to introduce two more tools: Postman and Robo 3T. These tools will help us in verify our application working (I won’t explain how to install because it’s easy and you can find this on their websites).
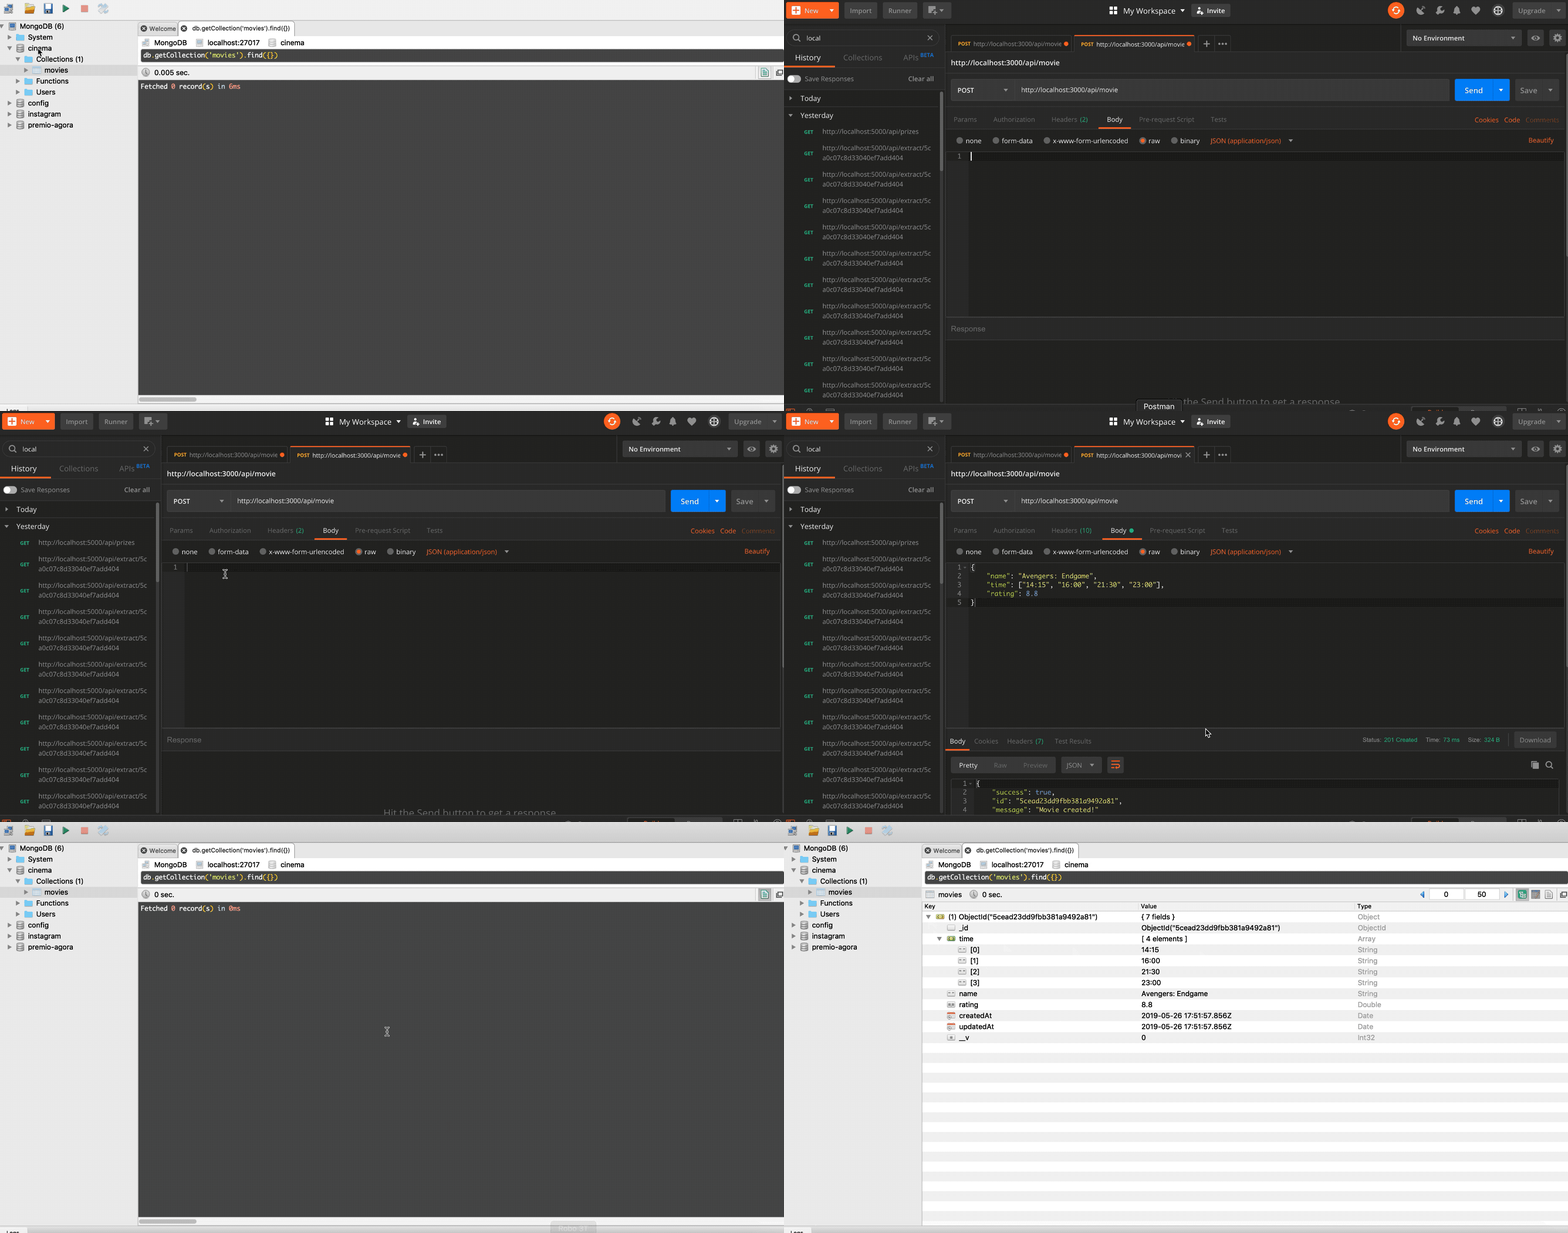
For now, let’s test add a new movie. Firstly, we should create a JSON file containing the movie’s information.
{
    "name": "Avengers: Endgame",
    "time": ["14:15", "16:00", "21:30", "23:00"],
    "rating": 8.8
}
For this, we need to POST this information in the database.
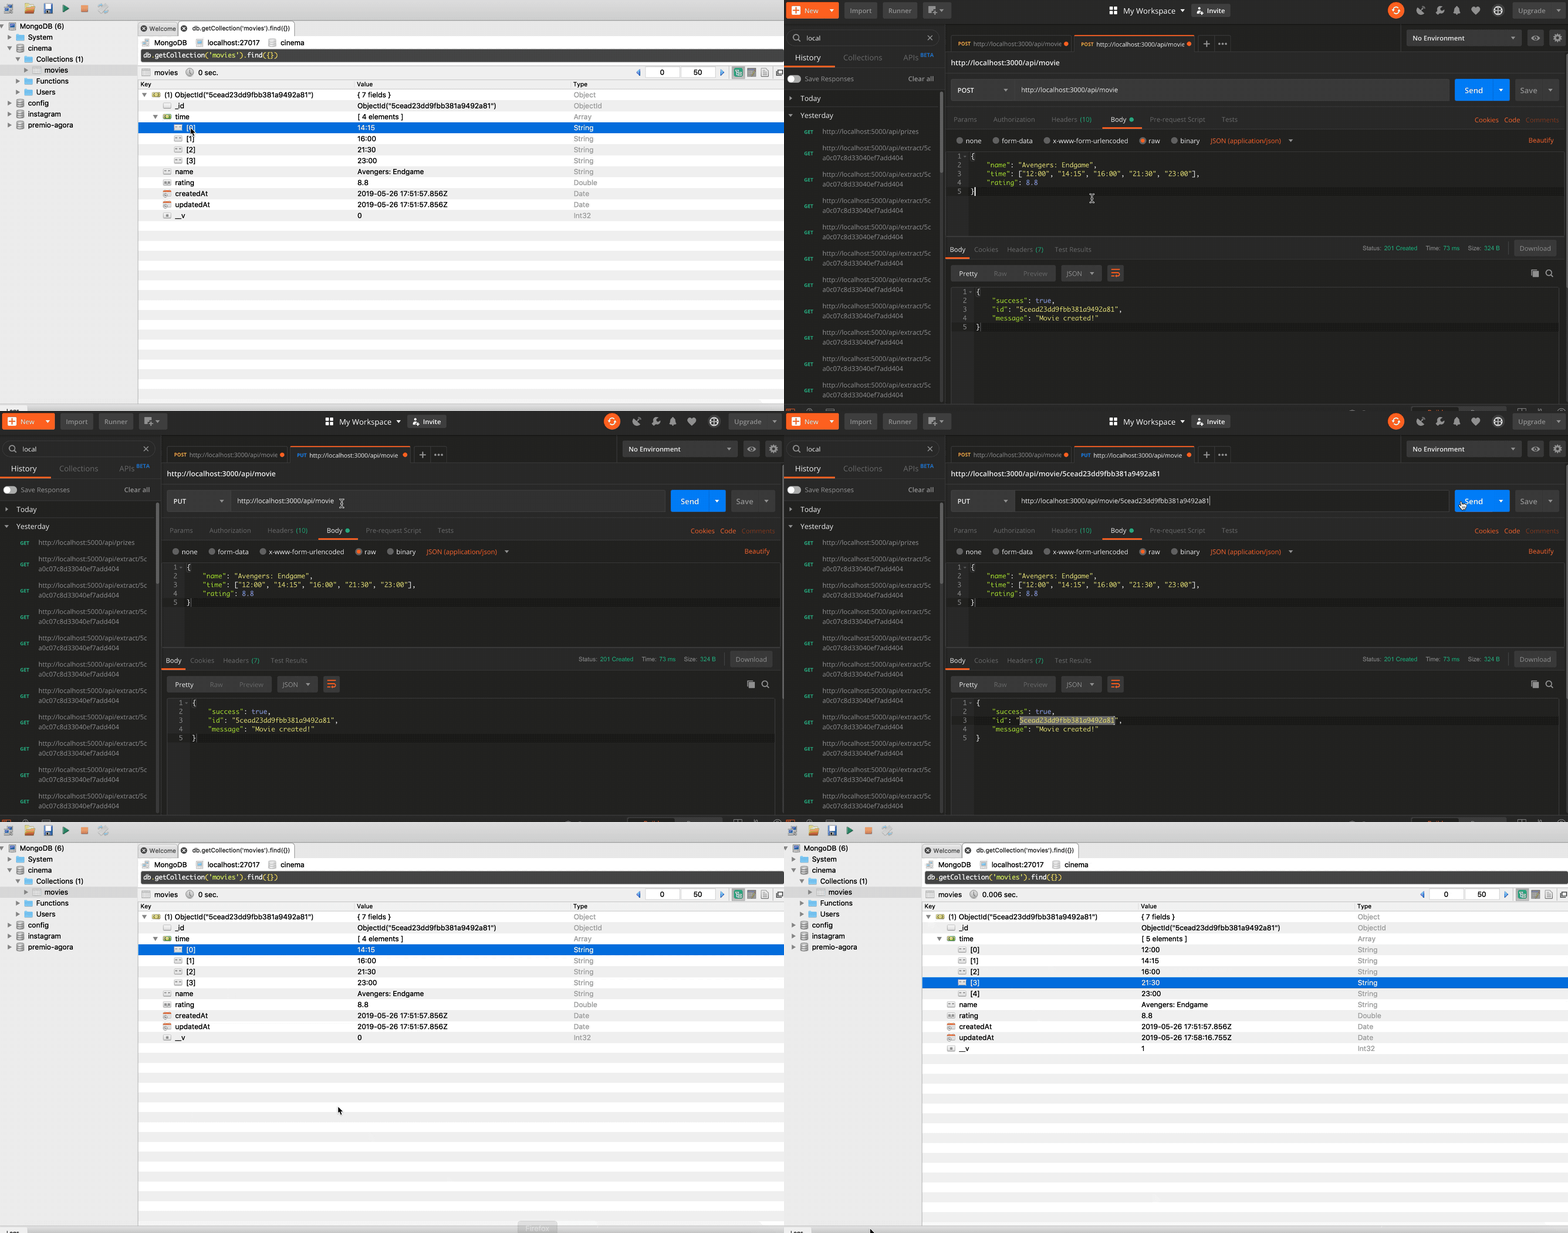
Imagine that the success of the movie was so big that the cinema has decided to add one more session. We have to update this. Using the PUT method, but this time, providing the movie’s id. We can do this.
{
    "name": "Avengers: Endgame",
    "time": ["12:00", "14:15", "16:00", "21:30", "23:00"],
    "rating": 8.8
}
Let’s add two more movies.
{
    "name": "The Lord Of The Rings: The return of the king",
    "time": ["15:00", "20:00"],
    "rating": 8.9
}and{
    "name": "The Godfather",
    "time": ["21:00", "23:50"],
    "rating": 9.2
}
And we’ll get all the movies with the GET method.
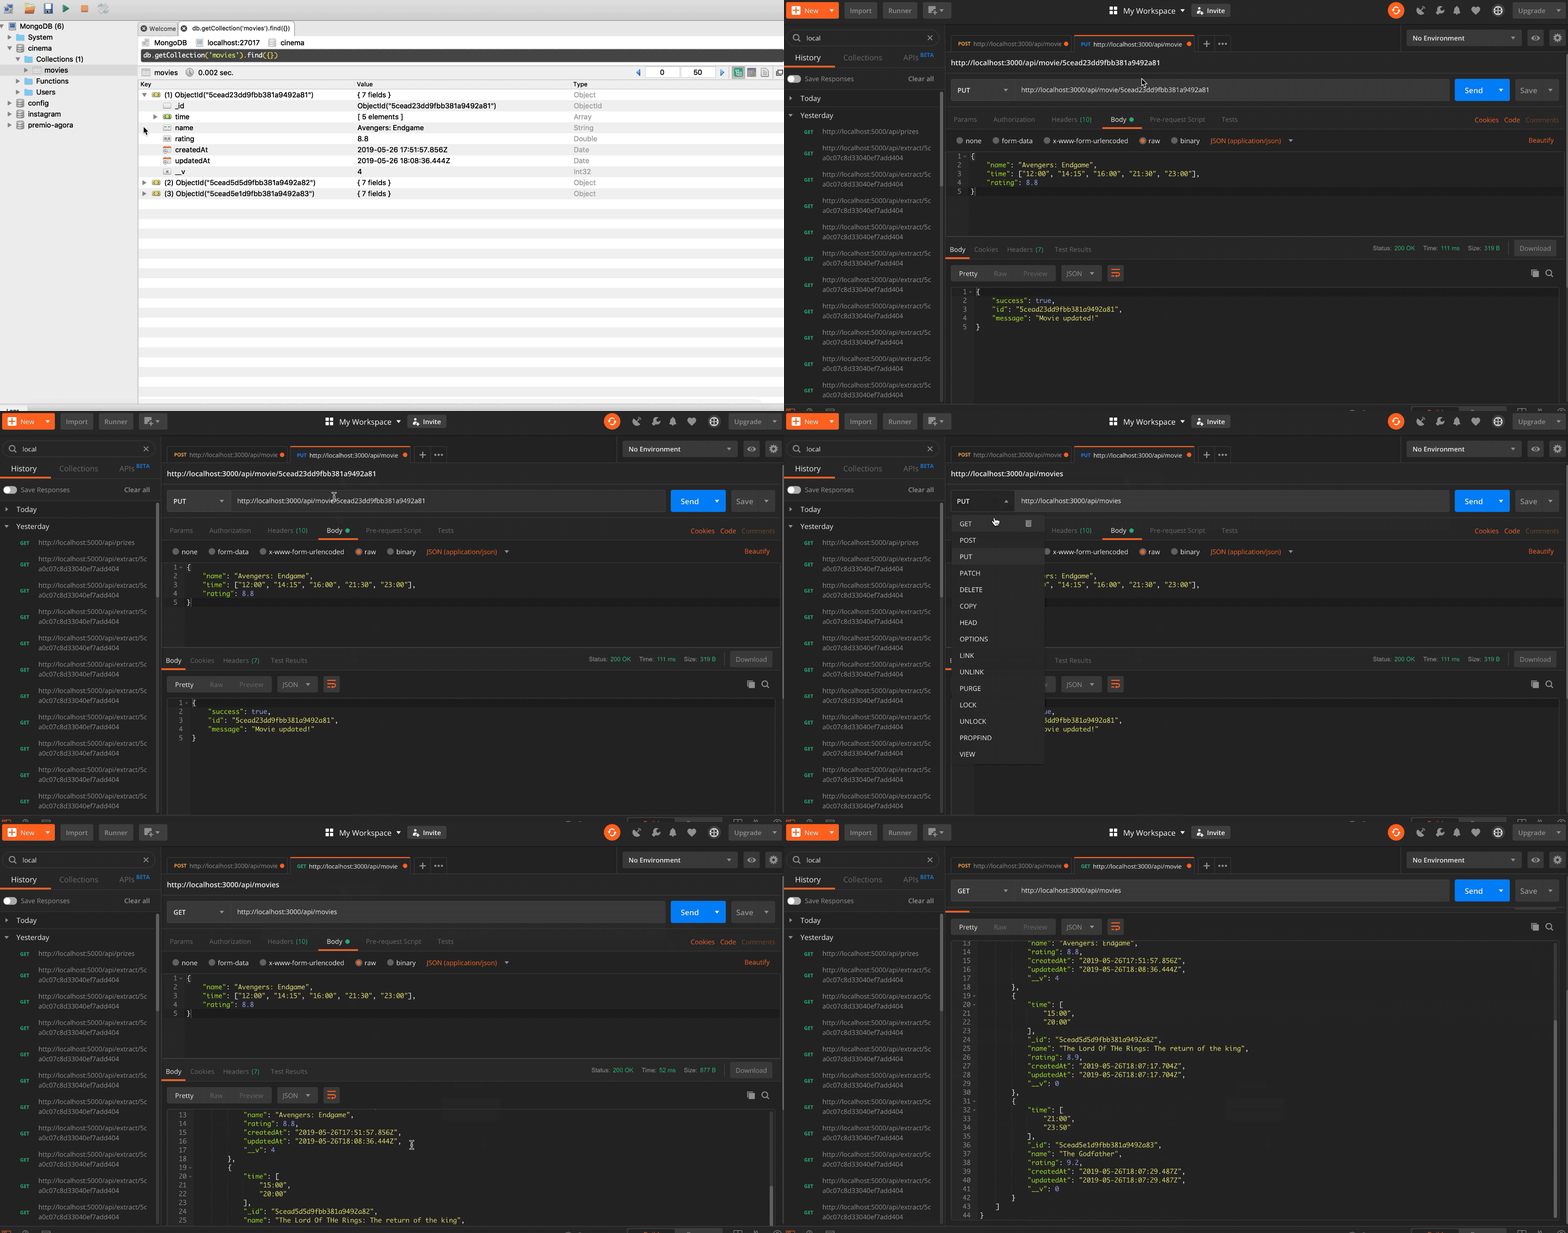
With the same GET method, we’ll select only the information about the movie “The Godfather”.
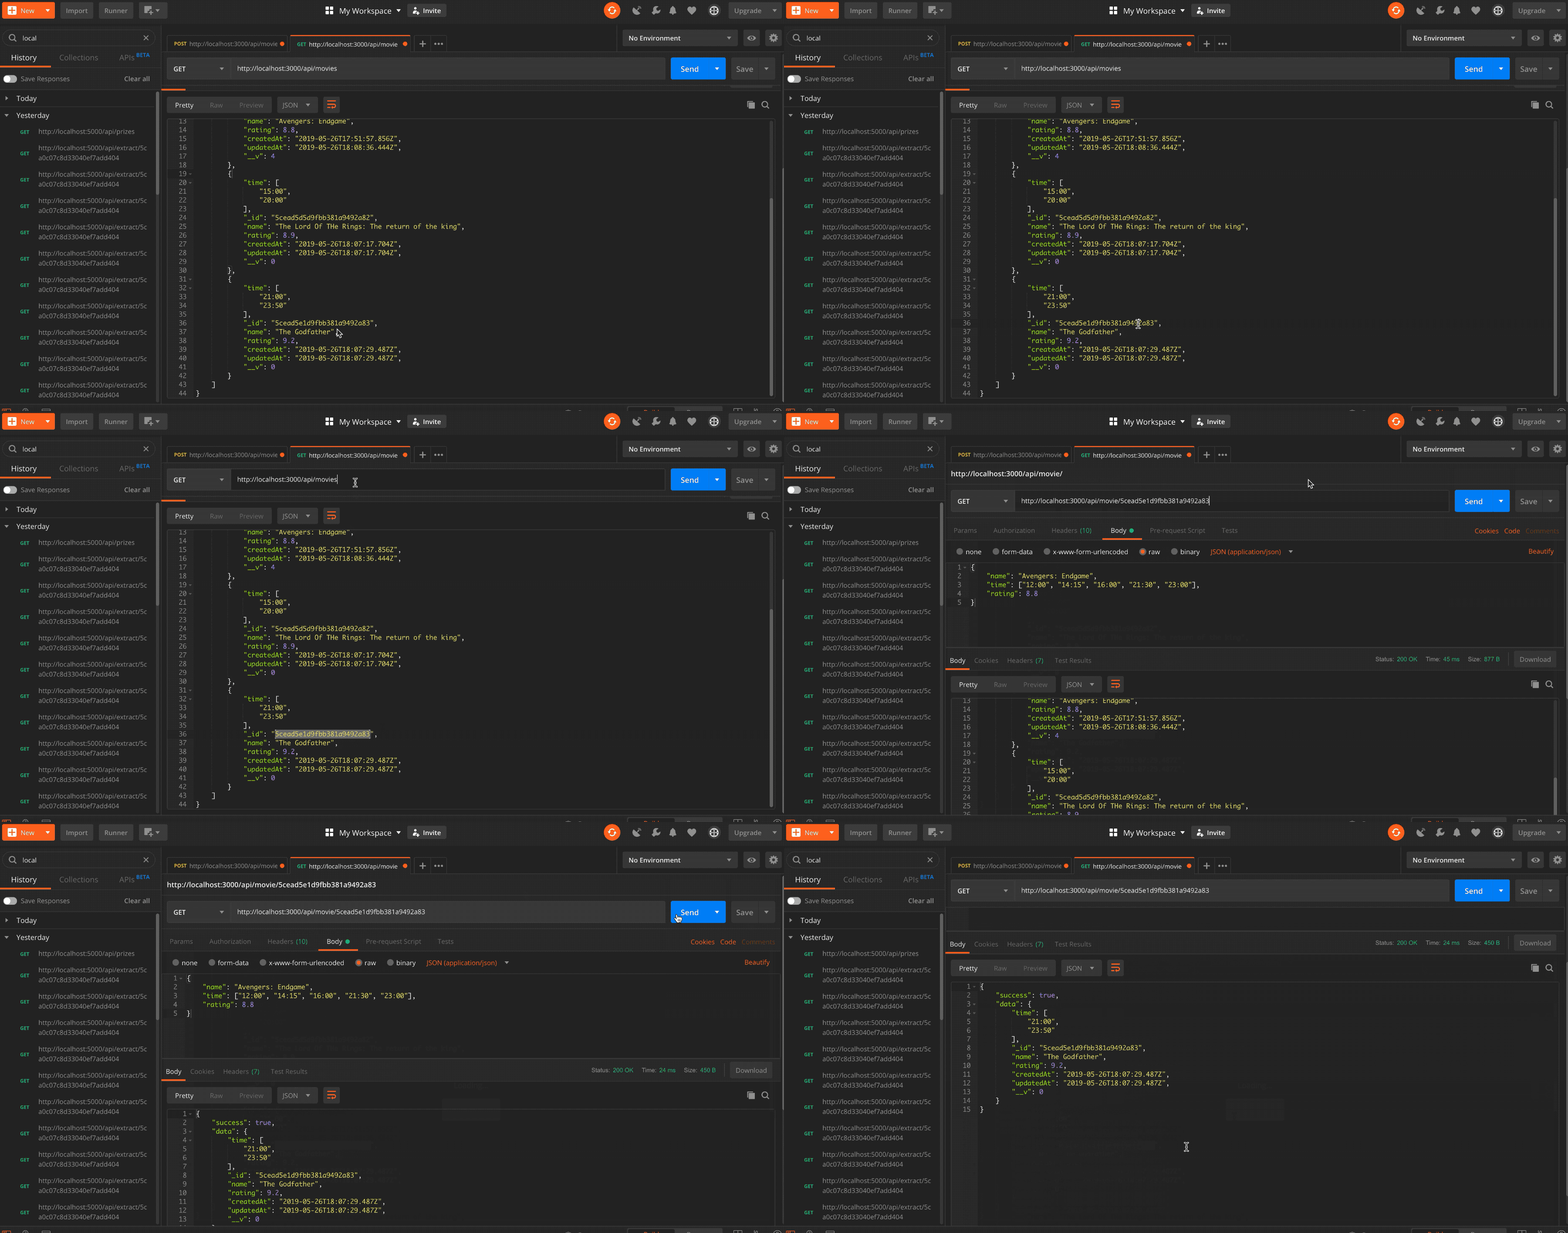
And finally, let’s DELETE the same movie.
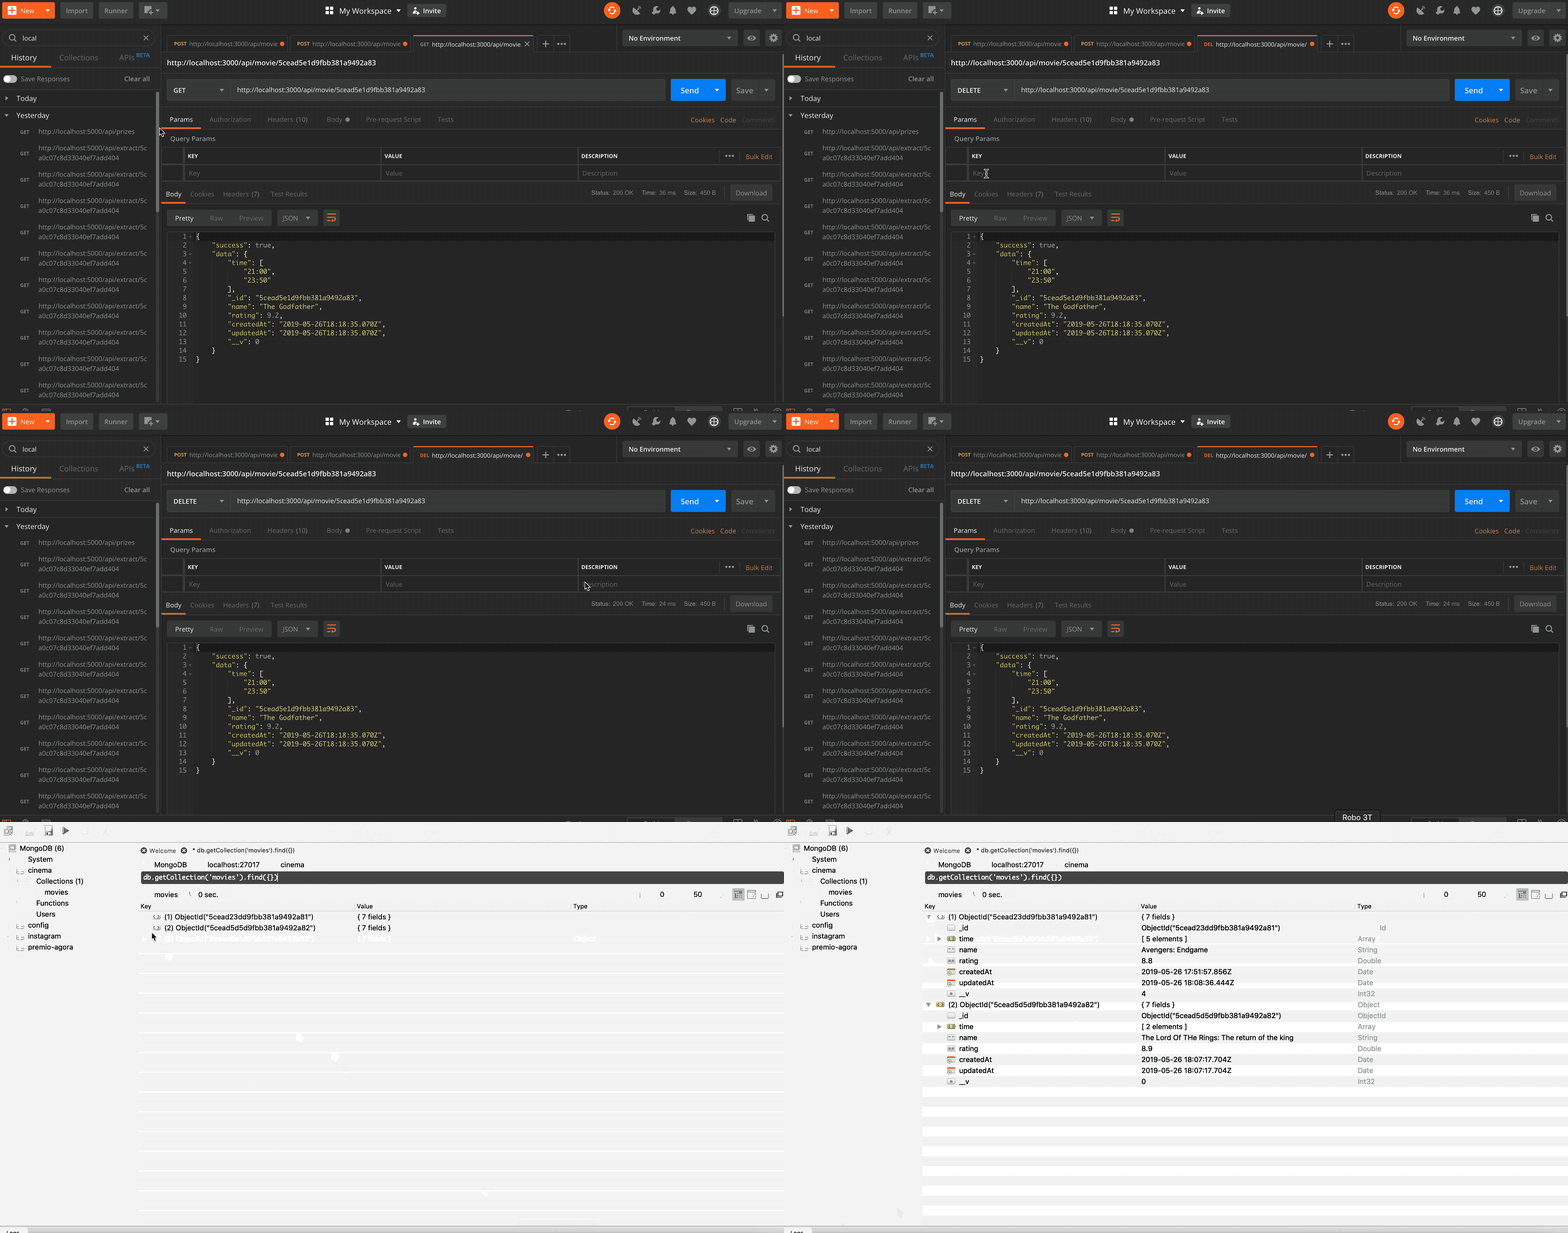
Phew!!! We’ve finished the backend part. With all this knowledge you’re able to create other entities, try to create a user entity, maybe an employee or a table price, use your imagination.
Let’s start the setting up of the Frontend.
2. Setting up the Frontend
Here we’re going to create all the visual parts, where the user will interact with our tool.
The first thing that we should do is go to the root of our project and create the client-side. For this, we need to understand about NPX.
NPX is a tool that its goal is to help round out the experience of using packages from the NPM registry. As NPM makes it super easy to install and manage dependencies hosted on the registry, NPX makes it easy to use CLI tools and other executables hosted on the registry.
Knowing this, let’s create our director. If you have the server-side for the Backend, we have the client-side for the Frontend.
$ npx create-react-app client
$ cd client
$ yarn start
If the application opened this screen that means you’ve done the things right.
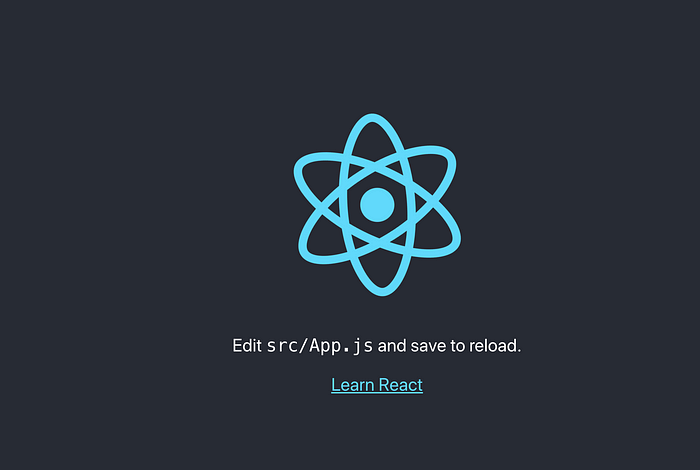
The default port is the number 3000, but we’ve already set this port to our Backend. Then, let’s changes it to 8000.
Hey Sam, why did you choose the port 8000?
Nothing special, I like this number and I currently use 3000 to backend and 8000 to frontend. 🤷♂️
To change the port we need to change it on client/package.json. Include PORT=<port number> in the file.
If you are a Windows user replace the fourth line to
"start": "set PORT=8000 && react-scripts start",Good! Probably you found out that React creates some default files. Let’s remove the unnecessaries files for us.
$ rm App.css index.css App.test.js serviceWorker.jsFor now, you don’t need to worry about these files, maybe in another post, I can explain them.
Sam, it’s boring, when will I see my application running? 😩
Patience my dear friend, as Axl Rose said: “All we need is just a little patience”. In a few minutes, you’ll see your App running.
But first, we need to set up our project installing the dependencies. we’ll need Axios, Bootstrap, StyledComponents, and React Table
- axios: It’s a promise-based the asynchronous code. It’s the most popular promise based HTTP.
- bootstrap: It’s is an open-source toolkit and the most popular front-end component library where allows you for developing with HTML, CSS, and JS.
- styled-components: It allows you to write actual CSS code to style your components.
- react-table: It’s a lightweight, fast, and extendable data grid built for React.
- react-router-dom: DOM bindings for React Routers.
$ yarn add styled-components react-table react-router-dom axios bootstrapor$ npm install styled-components react-table react-router-dom axios bootstrap --save
In the src directory, we should create the new directories that will be the structure of our project. Create an index.js file inside each directory, except the app folder.
$ cd src
$ mkdir api app components pages style
$ touch api/index.js components/index.js pages/index.js style/index.js
Move the App.js file to the app directory, but renaming to index.js.
$ mv App.js app/index.jsNow we can code. 🙂
First of all, update our file client/src/index.js for the following code.
After this, we’ll develop the header of the application. Now, we’ll developer the components of our project. Create the new files NavBar.jsx, Logo.jsx, and Links.jsx.
$ touch components/NavBar.jsx components/Logo.jsx components/Links.jsxWait a minute Sam! Now I’m seeing instead of JS you’re using JSX. Why are doing this?
Simple, JSX is a notation that Reacts chose to identify a JavaScript’s eXtension. It’s recommended to use it with React to describe what the UI should look like.
Knowing this, let’s create our files.
You can see how clean are our files. Do you remember that we created the file components/index.js? This file we export our components, it will allow us to import them in other files using the notation:
import { blabla } from './components'Look at how simple it’s.
Updating app/index.js. We’re able to see the growth of the project.
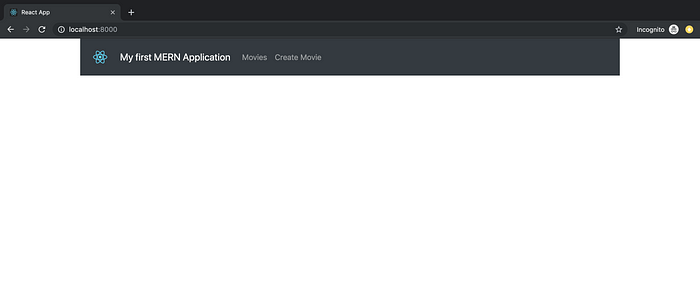
2.1. Integrating BE and FE
Now we’ll learn how to integrate the backend with our Frontend.
First of all, let’s update the file api/index.js.
Amazing! Now we can develop our routes. For this, we’ll need to update the file app/index.js adding the routes.
On pages folder, let’s create the files that will do the role of each application’s page: MoviesList.jsx, MoviesInsert.jsx and MoviesUpdate.jsx.
$ cd pages
$ touch MoviesList.jsx MoviesInsert.jsx MoviesUpdate.jsx
For now, let’s create simples files where you can see the page’s transition when you click in each link of the NavBar.
Look at how simple it is.
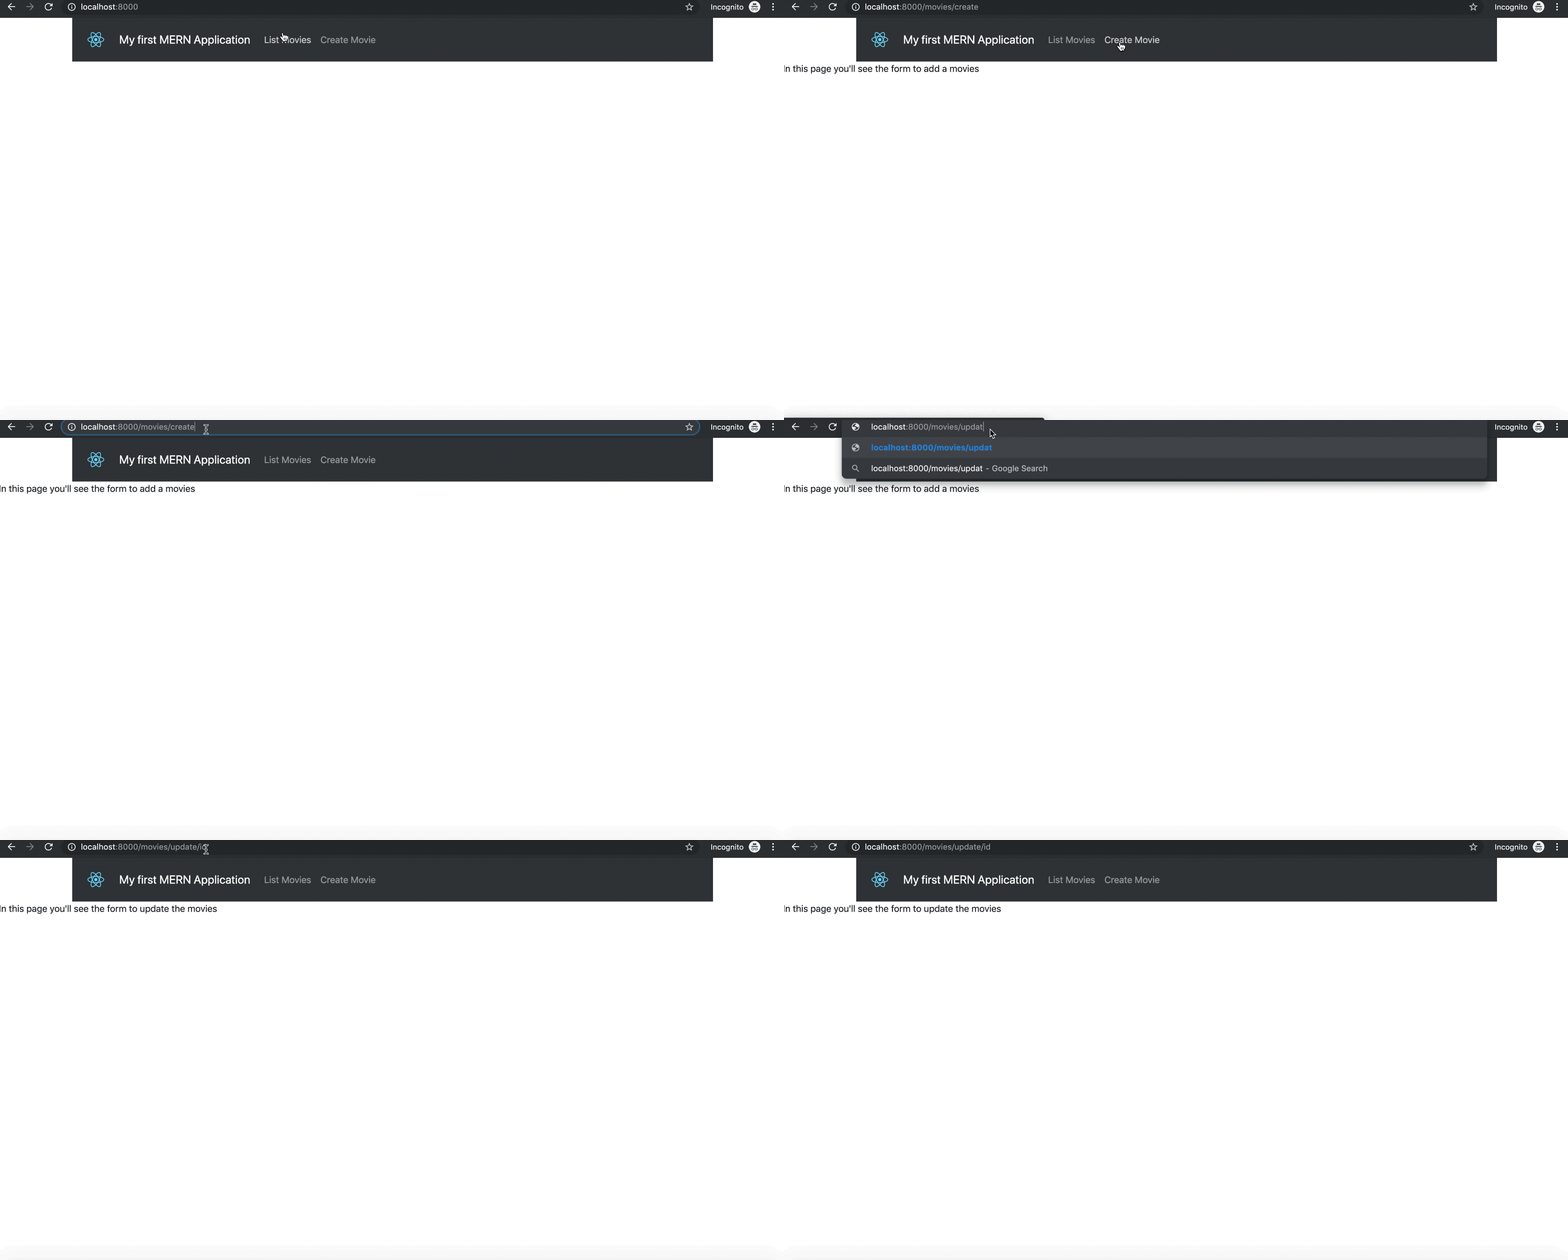
Hey Sam, I’ve seen something strange. In the code of the route to update the movie you put “:id” with a colon, but in the browser, you just put without the colon… why?
Because the colon means that React is waiting for a variable, that is, on the params object we have a variable called id. Further ahead, you’ll see something like this.
this.props.match.params.idOK, let’s edit our file to get the movies from the database: MoviesList.jsx.

Awesome, in this list let’s include two more things, these things will be buttons. One button to delete e another button to update.
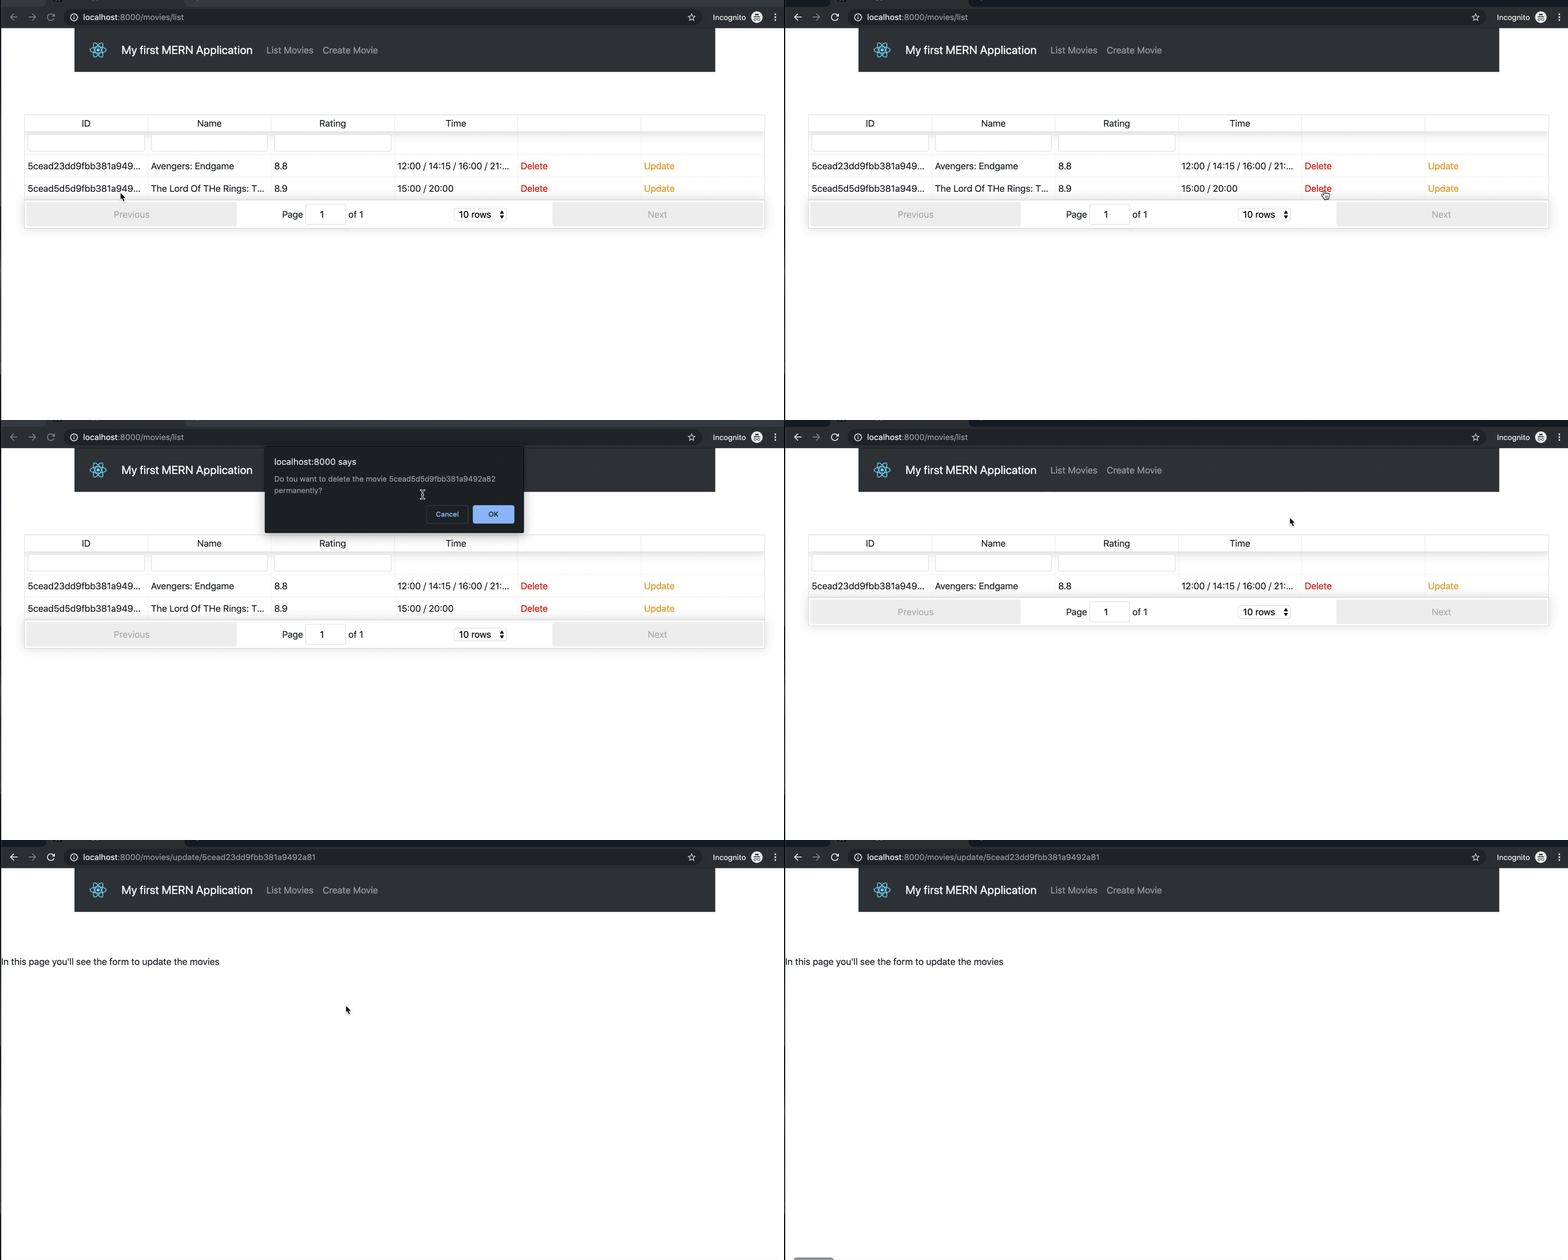
As you can see, now we’re able to delete a movie, but we still not able to update it, because we haven’t finished the component yet.
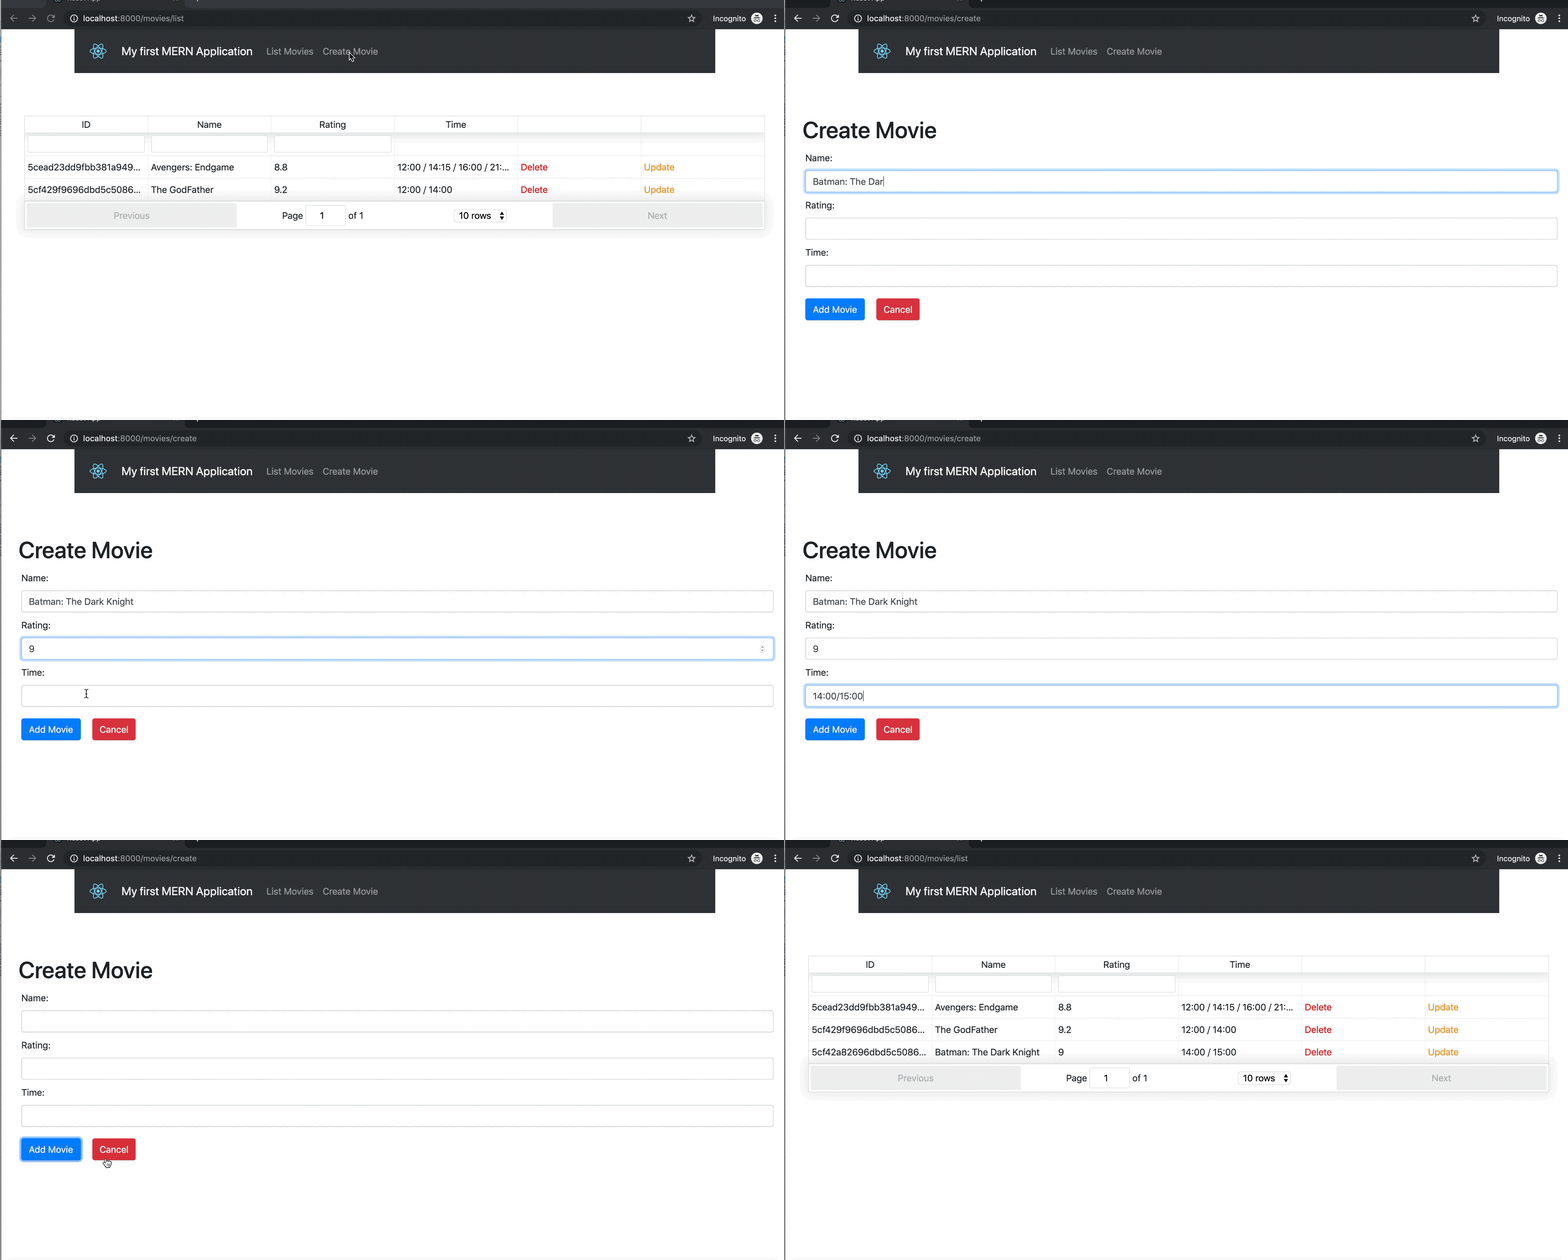
Before, to develop the update page, let’s create the insertion page.
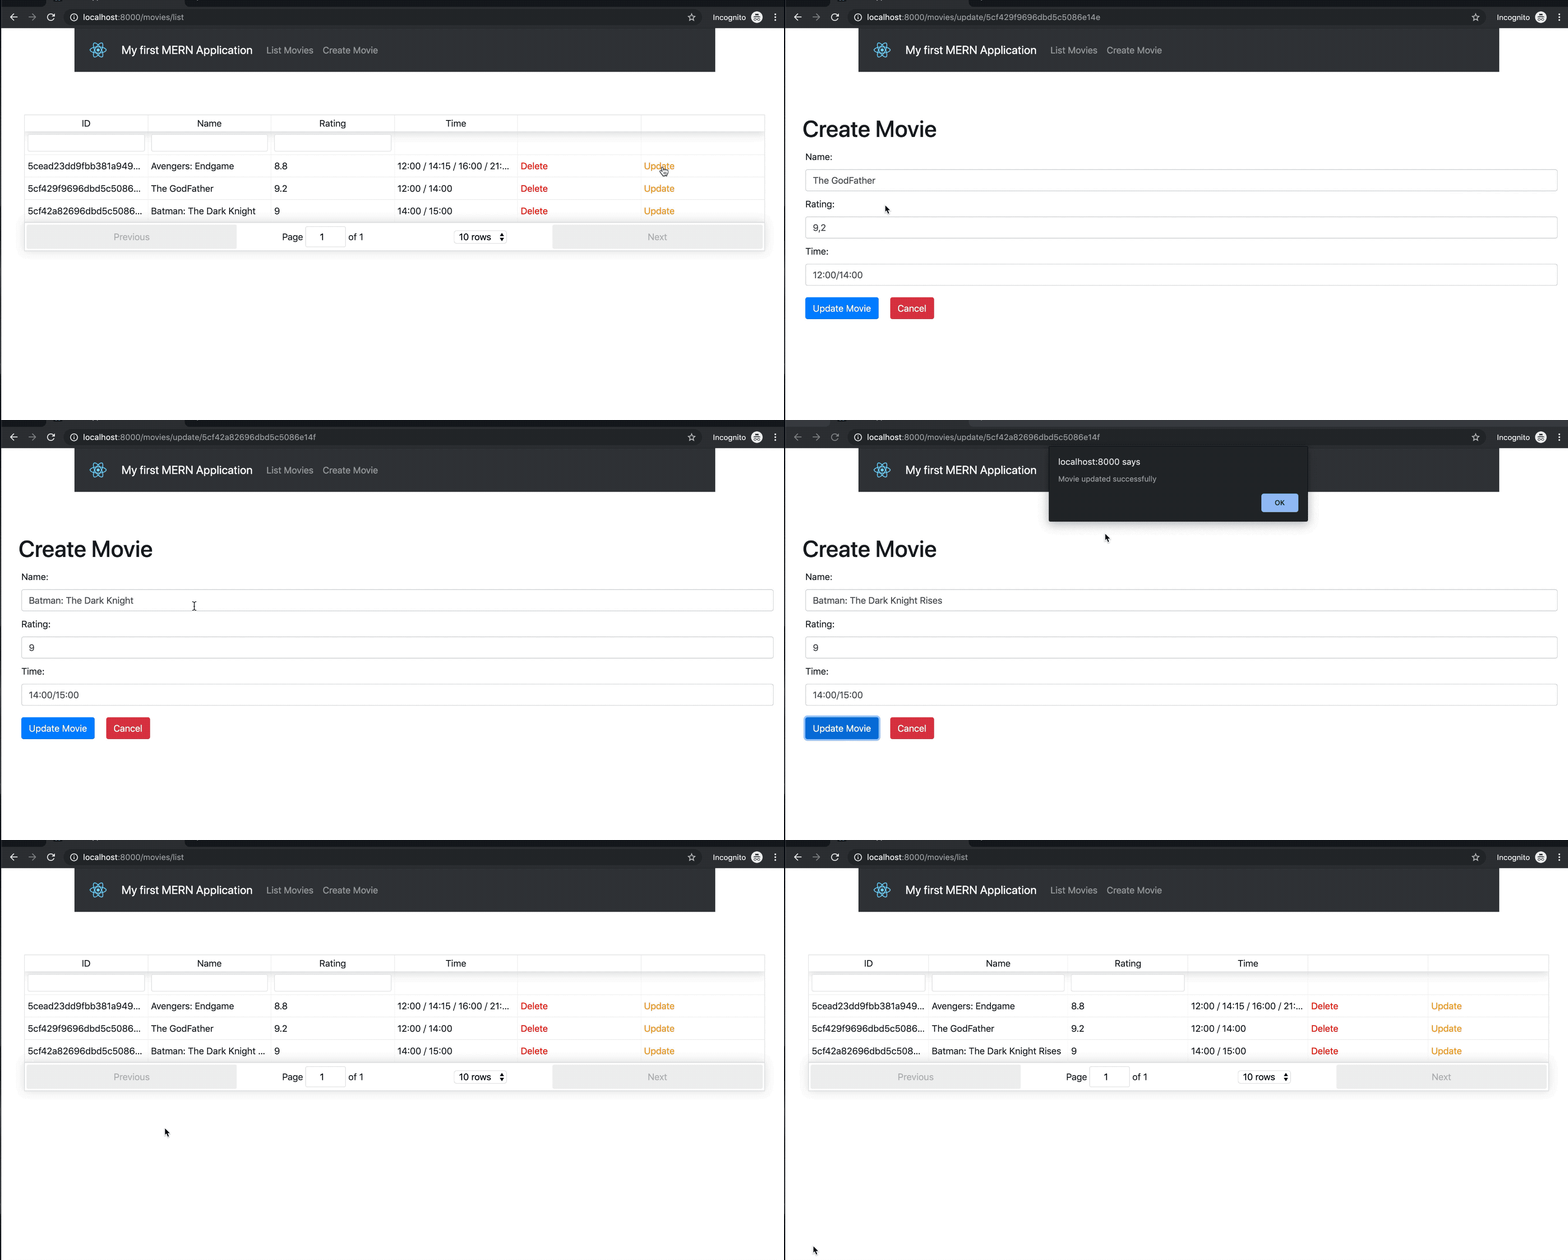
And finally, let’s create the update file.
3. Conclusion

And that’s it, friend. In this article, you have seen the structure to build a MERN application using diverse libraries provided by an amazing community around the world.
In this article, my intuit was to keep things simple for your understanding. This is a project that you can do many enhancements.
Maybe you can try, for instance, create a better structure to include the time of the movies or you can improve the code to put the update and insertion movie in the same file, what about to create a new entity called the customer and create the same REST operation for it? You can add a lot of new features to this. If you prefer, tell me in the comments.
I hope that I have contributed to your knowledge. Feel free to tell me what I should improve to write better articles.
The complete project you can find in my GitHub and search for the movies-app repository.
Thank you for your patience in reading this. See you in the next post.