Monday, November 18, 2019

PHP : How To Handle File Uploads With PHP

An common challenge faced by PHP programmers is how to accept files uploaded by visitors to your site. In this bonus excerpt from Chapter 12 of the recently published SitePoint book: Build Your Own Database Driven Web Site Using PHP & MySQL (4th Edition) by Kevin Yank, you’ll learn how to accept file uploads from your web site visitors securely and store them.
We’ll start with the basics: let’s write an HTML form that allows users to upload files. HTML makes this quite easy with its <input type="file"/> tag. By default, however, only the name of the file selected by the user is sent. To have the file itself submitted with the form data, we need to add enctype="multipart/form-data" to the <form> tag:
<form action="index.php" method="post" 
    enctype="multipart/form-data"> 
  <div><label id="upload">Select file to upload: 
    <input type="file" id="upload" name="upload"/></label></div> 
  <div> 
    <input type="hidden" name="action" value="upload"/> 
    <input type="submit" value="Submit"/> 
  </div> 
</form>
As we can see, a PHP script (index.php, in this case) will handle the data submitted with the form above. Information about uploaded files appears in a array called $_FILES that’s automatically created by PHP. As you’d expect, an entry in this array called $_FILES['upload'] (from the name attribute of the <input/> tag) will contain information about the file uploaded in this example. However, instead of storing the contents of the uploaded file, $_FILES['upload'] contains yet another array. We therefore use a second set of square brackets to select the information we want:
$_FILES['upload']['tmp_name']
Provides the name of the file stored on the web server’s hard disk in the system temporary file directory, unless another directory has been specified using the upload_tmp_dir setting in your php.ini file. This file is only kept as long as the PHP script responsible for handling the form submission is running. So, if you want to use the uploaded file later on (for example, store it for display on the site), you need to make a copy of it elsewhere. To do this, use the copy function described in the previous section.
$_FILES['upload']['name']
Provides the name of the file on the client machine before it was submitted. If you make a permanent copy of the temporary file, you might want to give it its original name instead of the automatically-generated temporary filename that’s described above.
$_FILES['upload']['size']
Provides the size (in bytes) of the file.
$_FILES['upload']['type']
Provides the MIME type of the file (sometimes referred to as file type or content type, an identifier used to describe the file format, for example, text/plainimage/gif, and so on).
Remember, ‘upload‘ is just the name attribute of the <input/> tag that submitted the file, so the actual array index will depend on that attribute.
You can use these variables to decide whether to accept or reject an uploaded file. For example, in a photo gallery we would only really be interested in JPEG and possibly GIF and PNG files. These files have MIME types of image/jpegimage/gif, and image/png respectively, but to cater to differences between browsers, you should use regular expressions to validate the uploaded file’s type:
if (preg_match('/^image/p?jpeg$/i', $_FILES['upload']['type']) or 
    preg_match('/^image/gif$/i', $_FILES['upload']['type']) or 
    preg_match('/^image/(x-)?png$/i', $_FILES['upload']['type'])) 
{ 
  // Handle the file... 
} 
else 
{ 
  $error = 'Please submit a JPEG, GIF, or PNG image file.'; 
  include $_SERVER['DOCUMENT_ROOT'] . '/includes/error.html.php'; 
  exit(); 
}
The exact MIME type depends on the browser in use. Internet Explorer uses image/pjpeg for JPEG images and image/x-png for PNG images, while Firefox and other browsers use image/jpeg and image/png respectively. See Chapter 8, Content Formatting with Regular Expressions for help with regular expression syntax.
While you can use a similar technique to disallow files that are too large (by checking the $_FILES['upload']['size'] variable), I’d advise against it. Before this value can be checked, the file is already uploaded and saved in the temporary directory. If you try to reject files because you have limited disk space and/or bandwidth, the fact that large files can still be uploaded, even though they’re deleted almost immediately, may be a problem for you.
Instead, you can tell PHP in advance the maximum file size you wish to accept. There are two ways to do this. The first is to adjust the upload_max_filesize setting in your php.ini file. The default value is 2MB, so if you want to accept uploads larger than that, you’ll immediately need to change that value. A second restriction, affecting the total size of form submissions, is enforced by the post_max_size setting in php.ini. Its default value is 8MB, so if you want to accept really big uploads, you’ll need to modify that setting, too.
The second method is to include a hidden <input/> field in your form with the name MAX_FILE_SIZE, and the maximum file size you want to accept with this form as its value. For security reasons, this value can’t exceed the upload_max_filesize setting in your php.ini, but it does provide a way for you to accept different maximum sizes on different pages. The following form, for example, will allow uploads of up to 1 kilobyte (1024 bytes):
<form action="upload.php" method="post" 
    enctype="multipart/form-data"> 
  <p><label id="upload">Select file to upload: 
  <input type="hidden" name="MAX_FILE_SIZE" value="1024"/> 
    <input type="file" id="upload" name="upload"/></label></p> 
  <p> 
    <input type="hidden" name="action" value="upload"/> 
    <input type="submit" value="Submit"/> 
  </p> 
</form>
Note that the hidden MAX_FILE_SIZE field must come before any <input type="file"/> tags in the form, so that PHP is apprised of this restriction before it receives any submitted files. Note also that this restriction can easily be circumvented by a malicious user who simply writes his or her own form without the MAX_FILE_SIZE field. For fail-safe security against large file uploads, use the upload_max_filesize setting in php.ini.
Assigning Unique Filenames
As I explained above, to keep an uploaded file, you need to copy it to another directory. And while you have access to the name of each uploaded file with its $_FILE['upload']['name'] variable, you have no guarantee that two files with the same name will not be uploaded. In such a case, storage of the file with its original name may result in newer uploads overwriting older ones.
For this reason, you’ll usually want to adopt a scheme that allows you to assign a unique filename to every uploaded file. Using the system time (which you can access using the PHP time function), you can easily produce a name based on the number of seconds since January 1, 1970. But what if two files happen to be uploaded within one second of each other? To help guard against this possibility, we’ll also use the client’s IP address (automatically stored in $_SERVER['REMOTE_ADDR'] by PHP) in the filename. Since you’re unlikely to receive two files from the same IP address within one second of each other, this is an acceptable solution for most purposes:
// Pick a file extension 
if (preg_match('/^image/p?jpeg$/i', $_FILES['upload']['type'])) 
{ 
  $ext = '.jpg'; 
} 
else if (preg_match('/^image/gif$/i', $_FILES['upload']['type'])) 
{ 
  $ext = '.gif'; 
} 
else if (preg_match('/^image/(x-)?png$/i', 
    $_FILES['upload']['type'])) 
{ 
  $ext = '.png'; 
} 
else 
{ 
  $ext = '.unknown'; 
} 
 
// The complete path/filename 
$filename = 'C:/uploads/' . time() . $_SERVER['REMOTE_ADDR'] . $ext; 
 
// Copy the file (if it is deemed safe) 
if (!is_uploaded_file($_FILES['upload']['tmp_name']) or 
    !copy($_FILES['upload']['tmp_name'], $filename)) 
{ 
  $error = "Could not  save file as $filename!"; 
  include $_SERVER['DOCUMENT_ROOT'] . '/includes/error.html.php'; 
  exit(); 
}
Important to note in the above code is the use of the is_uploaded_file function to check if the file is “safe.” All this function does is return TRUE if the filename it’s passed as a parameter ($_FILES['upload']['tmp_name'] in this case) was in fact uploaded as part of a form submission. If a malicious user loaded this script and manually specified a filename such as /etc/passwd (the system password store on Linux servers), and you had failed to use is_uploaded_file to check that $_FILES['upload'] really referred to an uploaded file, your script might be used to copy sensitive files on your server into a directory from which they would become publicly accessible over the Web! Thus, before you ever trust a PHP variable that you expect to contain the filename of an uploaded file, be sure to use is_uploaded_file to check it.
A second trick I have used in the above code is to combine is_uploaded_file and copy together as the condition of an if statement. If the result of is_uploaded_file($_FILES['upload']['tmp_name']) is FALSE (making !is_uploaded_file($_FILES['upload']['tmp_name']) TRUE), PHP will know immediately that the entire condition will be TRUE when it sees the or operator separating the two function calls. To save time, it will refrain from bothering to run copy, so the file won’t be copied when is_uploaded_file returns FALSE. On the other hand, if is_uploaded_file returns TRUE, PHP goes ahead and copies the file. The result of copy then determines whether or not an error message is displayed. Similarly, if we’d used the and operator instead of or, a FALSE result in the first part of the condition would cause PHP to skip evaluating the second part. This characteristic of if statements is known as short-circuit evaluation, and works in other conditional structures such as while and for loops, too.
Finally, note in the above script that I’ve used UNIX-style forward slashes (/) in the path, despite it being a Windows path. If I’d used backslashes I’d have had to replace them with double-backslashes (\) to avoid PHP interpreting them as escaped characters. However, PHP is smart enough to convert forward slashes in a file path to backslashes when it’s running on a Windows system. Since we can also use single slashes (/) as usual on non-Windows systems, adopting forward slashes in general for file paths in PHP will make your scripts more portable.

PHP File and Image Upload: Step by Step

There are lots of images and videos all over the internet. A lot of applications these days demand that the user is able to manipulate and upload files to the server. Thankfully, PHP provides the functions to handle file uploads. There are two main ways to handle file uploads with PHP: The barebones way, which includes building an HTML form that allows users to submit files, and then creating a PHP file upload script to handle the files; and using Cloudinary’s solution.
This post shows you how to use either of these methods to handle PHP file uploads:
  • The Barebones PHP way- This includes building an HTML form that enables users to submit files, and then creating a PHP upload script to handle the files.
  • Using Cloudinary’s Cloud Service - Cloudinary is a media management service has support for uploading, manipulating and managing all kinds of media files, including images, videos and audio to emerging media types. Cloudinary also provides an API for fast upload directly from your users’ browsers or mobile apps. Check out Cloudinary’s documentation for more information on how to integrate it in your apps.

File Upload in PHP - The barebones way

Let’s quickly get started on how to handle file upload with PHP, the barebones way. We need:

1. The HTML Form

You need to build up an HTML form that will contain the fields that the user will interact with to upload a file. Create an index.html file in your root directory and add the following code to it:
<!DOCTYPE html>
<html lang="en">
<head>
    <meta charset="UTF-8">
    <title>File Upload with PHP</title>
</head>
<body>
    <form action="fileUpload.php" method="post" enctype="multipart/form-data">
        Upload a File:
        <input type="file" name="myfile" id="fileToUpload">
        <input type="submit" name="submit" value="Upload File Now" >
    </form>
</body>
</html>
In the code above, we have a form with one input field and a submit button. The form tag has an action attribute that points to the script that will take care of the actual upload process. It also has a method attribute that specifies the kind of operation this form will undertake, which is a POST action.
The value of the enctype attribute is very important. It determines the content-type that the form submits. If we were not dealing with file uploads, then we would not specify the enctype attribute on the form in most cases.
Spin up your PHP server like so:
spin up the PHP server
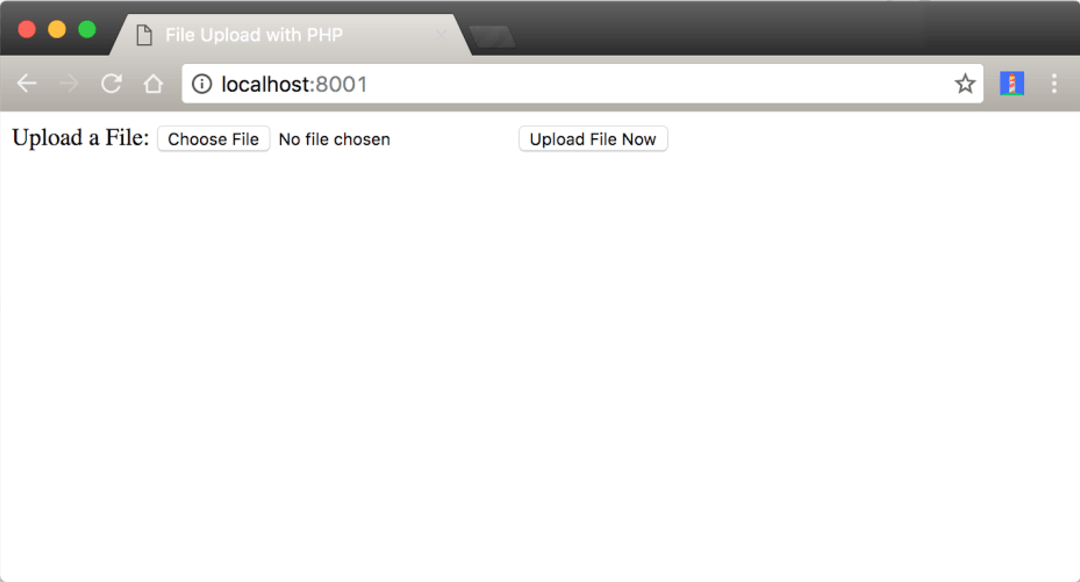
You should see something similar to this come up on your web page:
Web page with upload options
Note: Different browsers, such as Safari, Edge, Firefox and Chrome might display the form in different ways.

2. File Upload in PHP Script

There are lots of things to consider when dealing with file uploads. I’ll highlight the common ones in form of questions.
  • In which directory will the files be stored?
  • Is the directory writable?
  • What type of files should the users be allowed to upload?
  • What types of browsers should support the upload?
  • What is the maximum file size that the server should allow?
  • Should the user be allowed to upload the same image more than once?
Create a file, fileUpload.php, in the root directory and add this code to it:
<?php
    $currentDir = getcwd();
    $uploadDirectory = "/uploads/";

    $errors = []; // Store all foreseen and unforseen errors here

    $fileExtensions = ['jpeg','jpg','png']; // Get all the file extensions

    $fileName = $_FILES['myfile']['name'];
    $fileSize = $_FILES['myfile']['size'];
    $fileTmpName  = $_FILES['myfile']['tmp_name'];
    $fileType = $_FILES['myfile']['type'];
    $fileExtension = strtolower(end(explode('.',$fileName)));

    $uploadPath = $currentDir . $uploadDirectory . basename($fileName); 

    if (isset($_POST['submit'])) {

        if (! in_array($fileExtension,$fileExtensions)) {
            $errors[] = "This file extension is not allowed. Please upload a JPEG or PNG file";
        }

        if ($fileSize > 2000000) {
            $errors[] = "This file is more than 2MB. Sorry, it has to be less than or equal to 2MB";
        }

        if (empty($errors)) {
            $didUpload = move_uploaded_file($fileTmpName, $uploadPath);

            if ($didUpload) {
                echo "The file " . basename($fileName) . " has been uploaded";
            } else {
                echo "An error occurred somewhere. Try again or contact the admin";
            }
        } else {
            foreach ($errors as $error) {
                echo $error . "These are the errors" . "\n";
            }
        }
    }


?>
Look at the code above.
  • $fileName = $_FILES['myfile']['name']; This refers to the real name of the uploaded file.
  • $fileSize = $_FILES['myfile']['size']; This refers to the size of the file.
  • $fileTmpName = $_FILES['myfile']['tmp_name']; This is the temporary uploaded file that resides in the tmp/ directory of the web server.
  • $fileType = $_FILES['myfile']['type']; This refers to the type of the file. Is it a jpeg or png or mp3 file?
  • $fileExtension = strtolower(end(explode('.',$fileName))); This grabs the extension of the file.
  • $uploadPath = $currentDir . $uploadDirectory . basename($fileName); This is the path where the files will be stored on the server. We grabbed the current working directory.
In the code, we are checking to ensure that only jpeg and png files can be uploaded.
if (! in_array($fileExtension,$fileExtensions)) {
            $errors[] = "This file extension is not allowed. Please upload a JPEG or PNG file";
        }
// Checks to ensure that only jpeg and png files can be uploaded.
We are also checking that only files less than or equal to 2MB can be uploaded.
if ($fileSize > 2000000) {
            $errors[] = "This file is larger than 2MB. It must be less than or equal to 2MB";
        }
// Checks to ensure the file is not more than 2MB
Note: Before you try out your code again, you need to ensure that there are some configurations in place.
  • Make sure the uploads/ directory is writable. Run this command: chmod 0755 uploads/ on your terminal to make the directory writable.
  • Open your php.ini file and ensure that these constants have correct values like:
    • max_file_uploads = 20
    • upload_max_size = 2M
    • post_max_size = 8M
Now, run the code again. Your file should upload successfully to the uploads directory.
Note: There are many checks you should consider when handling file uploads, including security precautions . You really don’t want someone uploading a virus to your web server. Do you? So by all means don’t use this exact code above in production. Add more valuable checks!
Also, it’s recommended that you upload your files to a dedicated file server, not just your web application server. Check out the source code for a tutorial.

Laravel : How to Upload Multiple Images and Files in Laravel with Validation

File upload is an essential aspect of any project. Given this importance, it is surprising that many developers face challenges of adding file upload feature to their projects. In particular, developers are unsure about how to upload and validate files.
In this tutorial, I will discuss how to implement Laravel file upload functionality with multiple file and image uploading option. I will use the Laravel storage folder and then create database record for uploading files. I will use Laravel 5.5 and Bootstrap to power the code of this tutorial.
You might also like: PHP File Upload with jQuery AJAX
I have installed a Laravel app on a Cloudways managed Laravel server because it has everything I’ll need for this tutorial. If you do not have an account on Cloudways, sign up for free, and check out the following GIF to setup the server and application in just a few clicks.
Create Model with Migration
I will start by creating the model and the tables in which I will save the files.
Launch the SSH terminal, go to the application’s public root folder and type following commands:
  1. php artisan make:model Item -m
  2. php artisan make:model ItemDetails -m

Item Model

When the migration and the model have been created successfully, go to app/Item.php and add the following Model code to it:
  1. <?php
  2. namespace App;
  3. use Illuminate\Database\Eloquent\Model;
  4. class Item extends Model
  5. {
  6. protected $fillable = ['name'];
  7. }

Create the Migration

Go to the database/migration folder and open the migration file for item. You will see the default structure that include (in my case) id , name, timestamps.
  1. <?php
  2. use Illuminate\Support\Facades\Schema;
  3. use Illuminate\Database\Schema\Blueprint;
  4. use Illuminate\Database\Migrations\Migration;
  5. class CreateItemsTable extends Migration
  6. {
  7. public function up()
  8. {
  9. Schema::create('items', function (Blueprint $table) {
  10. $table->increments('id');
  11. $table->string('name');
  12. $table->timestamps();
  13. });
  14. }
  15. public function down()
  16. {
  17. Schema::drop('items');
  18. }
  19. }?>

Model Of ItemDetails

The model comprises of the following code:
  1. <?php
  2. namespace App;
  3. use Illuminate\Database\Eloquent\Model;
  4. class ItemDetail extends Model
  5. {
  6. protected $fillable = ['item_id', 'filename'];
  7. public function item()
  8. {
  9. return $this->belongsTo('App\Item');
  10. }
  11. }
  12. ?>
In the above code, I used belongTO because itemDetails belongs to Item table and item_id is the foreign key. This is known as inverse relation in Laravel.

Migration of ItemDetails Table

Go to the database/migration folder and open the migration file for itemdetails. You will see the default structure that include id , name . timestamps.
  1. <?php
  2. use Illuminate\Support\Facades\Schema;
  3. use Illuminate\Database\Schema\Blueprint;
  4. use Illuminate\Database\Migrations\Migration;
  5. class CreateItemDetailsTable extends Migration
  6. {
  7. /**
  8. * Run the migrations.
  9. *
  10. * @return void
  11. */
  12. public function up()
  13. {
  14. Schema::create('item_details', function (Blueprint $table) {
  15. $table->increments('id');
  16. $table->integer('item_id')->unsigned();
  17. $table->foreign('item_id')->references('id')->on('items');
  18. $table->string('filename');
  19. $table->timestamps();
  20. });
  21. }
  22. public function down()
  23. {
  24. Schema::drop('item_details');
  25. }
  26. }
  27. ?>

Next , In the app/Providers/AppServiceProvider.php file, the boot method set a default string length:
  1. use Illuminate\Support\Facades\Schema;
  2. public function boot()
  3. {
  4. Schema::defaultStringLength(191);
  5. }

Database Configuration

In a Laravel powered app, database configuration is handled by two files: env and config/database.php. In my case, I created a database with the name uploading. The Cloudways Database Manager makes the entire process very easy.
Next, run the following command in the terminal to create tables in the database:
php artisan migrate
Now, when you check the database, you will see that the tables have been created  successfully.

Set up the Route

Route sets the application URL and the controller method for this URL. Routes are located in route/web.php and contains the following code:
  1. Route::get('/multiuploads', 'UploadController@uploadForm');
  2. Route::post('/multiuploads', 'UploadController@uploadSubmit');
create the Controller by using the following command:
php artisan make:controller UploadController
Next, go to app/Http/Controller/UploadController and open the Controller file. Add the following code to it:
  1. namespace App\Http\Controllers;
  2. use Illuminate\Http\Request;
  3. class UploadController extends Controller
  4. {
  5. public function uploadForm()
  6. {
  7. return view('upload_form');
  8. }
  9. public function uploadSubmit(Request $request)
  10. {
  11. // coding ….
  12. }
  13. }

View File (Upload_form.blade.php)

In the view file, I have used Bootstrap for styling the code, link stylesheet , jQuery, JavaScript files.
  1. <!doctype html>
  2. <html lang="{{ app()->getLocale() }}">
  3. <head>
  4. <meta charset="utf-8">
  5. <meta http-equiv="X-UA-Compatible" content="IE=edge">
  6. <meta name="viewport" content="width=device-width, initial-scale=1">
  7. <title>Laravel Uploading</title>
  8. <link rel="stylesheet" href="https://maxcdn.bootstrapcdn.com/bootstrap/3.3.7/css/bootstrap.min.css" integrity="sha384-BVYiiSIFeK1dGmJRAkycuHAHRg32OmUcww7on3RYdg4Va+PmSTsz/K68vbdEjh4u" crossorigin="anonymous">
  9. <!-- Optional theme -->
  10. <link rel="stylesheet" href="https://maxcdn.bootstrapcdn.com/bootstrap/3.3.7/css/bootstrap-theme.min.css" integrity="sha384-rHyoN1iRsVXV4nD0JutlnGaslCJuC7uwjduW9SVrLvRYooPp2bWYgmgJQIXwl/Sp" crossorigin="anonymous">
  11. <!-- Fonts -->
  12. <link href="https://fonts.googleapis.com/css?family=Raleway:100,600" rel="stylesheet" type="text/css">
  13. <!-- Styles -->
  14. <style>
  15. .container {
  16. margin-top:2%;
  17. }
  18. </style>
  19. </head>
  20. <body>
  21. @if (count($errors) > 0)
  22. <div class="alert alert-danger">
  23. <ul>
  24. @foreach ($errors->all() as $error)
  25. <li>{{ $error }}</li>
  26. @endforeach
  27. </ul>
  28. </div>
  29. @endif
  30. <div class="container">
  31. <div class="row">
  32. <div class="col-md-2"> <img src="/32114.svg" width="80" /></div>
  33. <div class="col-md-8"><h2>Laravel Multiple File Uploading With Bootstrap Form</h2>
  34. </div>
  35. </div>
  36. <br>
  37. <div class="row">
  38. <div class="col-md-3"></div>
  39. <div class="col-md-6">
  40. <form action="/multiuploads" method="post" enctype="multipart/form-data">
  41. {{ csrf_field() }}
  42. <div class="form-group">
  43. <label for="Product Name">Product Name</label>
  44. <input type="text" name="name" class="form-control" placeholder="Product Name" >
  45. </div>
  46. <label for="Product Name">Product photos (can attach more than one):</label>
  47. <br />
  48. <input type="file" class="form-control" name="photos[]" multiple />
  49. <br /><br />
  50. <input type="submit" class="btn btn-primary" value="Upload" />
  51. </form>
  52. </div>
  53. </div>
  54. </div>
  55. </body>
  56. </html>

Controller with Validation

I have use Bootstrap classes for showing the alert for validation and use Laravel Validation methods to validate the type of file. Use the following code for the controller:
  1. <?php
  2. namespace App\Http\Controllers;
  3. use App\Item;
  4. use App\ItemDetail;
  5. use Illuminate\Http\Request;
  6. class UploadController extends Controller
  7. {
  8. public function uploadForm()
  9. {
  10. return view('upload_form');
  11. }
  12. public function uploadSubmit(Request $request)
  13. {
  14. $this->validate($request, [
  15. 'name' => 'required',
  16. 'photos'=>'required',
  17. ]);
  18. if($request->hasFile('photos'))
  19. {
  20. $allowedfileExtension=['pdf','jpg','png','docx'];
  21. $files = $request->file('photos');
  22. foreach($files as $file){
  23. $filename = $file->getClientOriginalName();
  24. $extension = $file->getClientOriginalExtension();
  25. $check=in_array($extension,$allowedfileExtension);
  26. //dd($check);
  27. if($check)
  28. {
  29. $items= Item::create($request->all());
  30. foreach ($request->photos as $photo) {
  31. $filename = $photo->store('photos');
  32. ItemDetail::create([
  33. 'item_id' => $items->id,
  34. 'filename' => $filename
  35. ]);
  36. }
  37. echo "Upload Successfully";
  38. }
  39. else
  40. {
  41. echo '<div class="alert alert-warning"><strong>Warning!</strong> Sorry Only Upload png , jpg , doc</div>';
  42. }
  43. }
  44. }
  45. }
  46. }?>

Storing Data and Files in Laravel

Laravel provides a storage filesystem that stores all the data including files and images.
For this, Laravel provides config/filesystems.php, located in the config folder. In this file, you can specify the locations for your file storage.
  1. return [
  2. 'default' => 'local',
  3. 'disks' => [
  4. 'local' => [
  5. 'driver' => 'local',
  6. 'root' => storage_path('app'),
  7. ],
  8. // ...

Using the above code snippet, you could save the files in app/storage folder instead of the public folder. This is a good coding practice for storing data because this location is inaccessible from the browser. For the purpose of this tutorial, I have created a folder with the name photos in storage/app/.
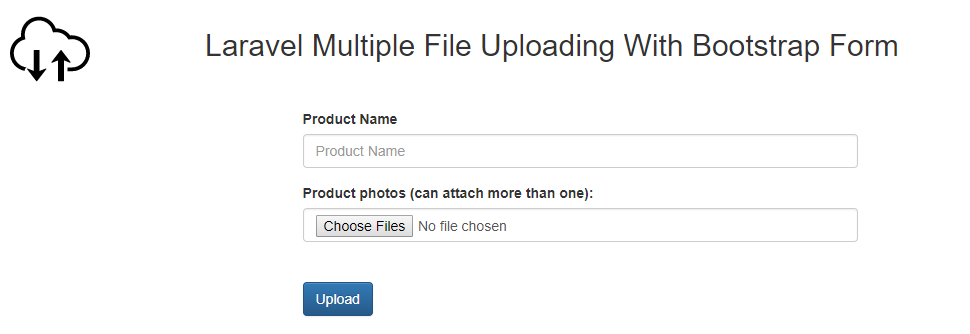
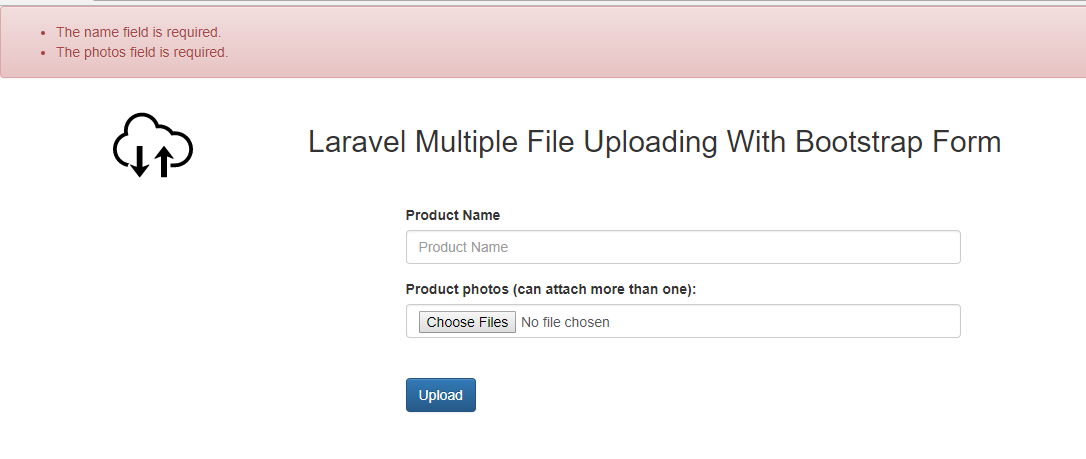
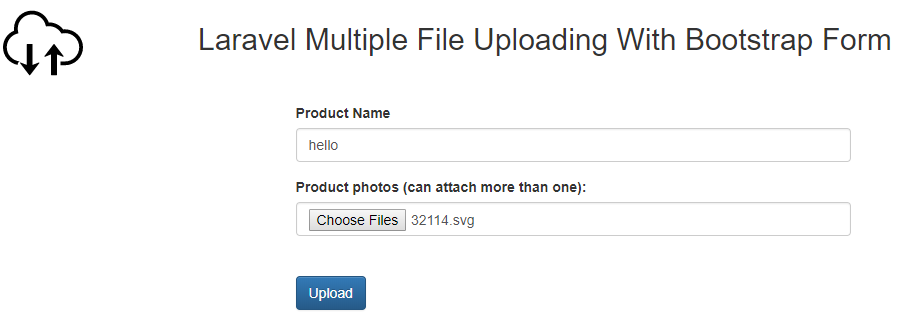
When the run the app in the browser, you will see the following screens:

With Validation

laravel file upload validation
laravel multiple file upload form
laravel file upload error
To see the image and file upload in Laravel in action, check out the demo.

Difference Between Local and Public Disks

You can see the disks local and public defined in config/filesystems.php. Laravel uses the local disk configuration by default. The underlying difference between local and public disk is that local disk is private and can’t be accessed from the browser, whereas the public disk can be easily accessed from the browser.
Since the public disk is in storage/app/public and Laravel’s server root is in public, you need to link storage/app/public to Laravel’s public folder. We can do by running php artisan storage:link.

Manipulating files

Laravel largely needs external help in resizing images, adding filters and other related operations. Adding these feature to the native environment of Laravel will only bloat the application since there isn’t any installs needed. For that, we need a package called intervention/image. Earlier above, we have already installed this package, but still composer requires it for reference.
We don’t need to register anything since Laravel can automatically detect packages. Read the following if you are using lesser version than Laravel 5.5.
To resize an image
  1. $image = Image::make(storage_path('app/public/profile.jpg'))->resize(300, 200);
Even Laravel’s packages are fluent.

Sending Files as Email Attachments

For send files with attachments you just paste the following code in your controller according to input fields.
  1. <?php
  2. ...
  3. ...
  4. public function uploadDocument(Request $request) {
  5. $title = $request->file('name');
  6. // Get the uploades file with name document
  7. $document = $request->file('document');
  8. // Required validation
  9. $request->validate([
  10. 'name' => 'required|max:255',
  11. 'document' => 'required'
  12. ]);
  13. // Check if uploaded file size was greater than
  14. // maximum allowed file size
  15. if ($document->getError() == 1) {
  16. $max_size = $document->getMaxFileSize() / 1024 / 1024; // Get size in Mb
  17. $error = 'The document size must be less than ' . $max_size . 'Mb.';
  18. return redirect()->back()->with('flash_danger', $error);
  19. }
  20. $data = [
  21. 'document' => $document
  22. ];
  23. // If upload was successful
  24. // send the email
  25. $to_email = test@example.com;
  26. \Mail::to($to_email)->send(new \App\Mail\Upload($data));
  27. return redirect()->back()->with('flash_success', 'Your document has been uploaded.');
  28. }

Create email sender class

To send the email in Laravel, you need to create a separate class file. This class will have the functionality to prepare email and its body. Also we will attach the uploaded file as inline attachment.
Here is my email class:
  1. <?php
  2. #App\Mail\Upload.php
  3. namespace App\Mail;
  4. use Illuminate\Bus\Queueable;
  5. use Illuminate\Mail\Mailable;
  6. use Illuminate\Queue\SerializesModels;
  7. class Upload extends Mailable
  8. {
  9. use Queueable, SerializesModels;
  10. protected $data;
  11. /**
  12. * Create a new message instance.
  13. *
  14. * @return void
  15. */
  16. public function __construct($data=[])
  17. {
  18. $this->data = $data;
  19. }
  20. /**
  21. * Build the message.
  22. *
  23. * @return $this
  24. */
  25. public function build()
  26. {
  27. return $this->view('emails/upload')
  28. ->subject('Document Upload')
  29. ->attach($this->data['document']->getRealPath(),
  30. [
  31. 'as' => $this->data['document']->getClientOriginalName(),
  32. 'mime' => $this->data['document']->getClientMimeType(),
  33. ]);
  34. }
  35. }
The important functions used here are:
  1. getRealPath(): Get the temporary upload path
  2. getClientOriginalName(): Get the name of uploaded file
  3. getClientMimeType(): Get the mime type of uploaded file

Create the email template

In the above step, our email class refers to the email template as return $this->view(’emails/upload’). So we will create the email template at resources/views/emails/upload.blade.php
  1. #resources/views/emails/upload.blade.php
  2. <p>Hi,</p>
  3. <p>Please download the attached file.</p>
  4. <p>Thanks</p>
Now when you submit the form, your uploaded file will be sent an email attachment.