Monday, January 3, 2022

How to upload multiple images with preview using Laravel and Vue

Image upload is one of the most popular features in modern web. But from all the components that can make up a form, the image upload component could be one of the most frustrating for a lot of developers since it demand a lot of effort and styling. And that's why I created Media-Upload package.

Media-Upload is an easy to setup Vue package for multiple images upload with preview that support the create and the update form, and it will handle the upload for you via ajax requests.

For this tutorial, we will create a simple form where you can also upload images using Laravel 8Vue 3 and Bootstrap 5.
Image description
As you can see, media-upload preview the images instead of just an input file field.

Step 1: Backend Setup

First of all, let's stat with the backend by preparing the database.
we will need two tables, the posts table

Schema::create('posts', function (Blueprint $table) {
  $table->id();
  $table->string('title');
  $table->string('description');
  $table->timestamps();
});

and the images table

Schema::create('images', function (Blueprint $table) {
  $table->id();
  $table->foreignId('post_id')->constrained();
  $table->string('name');
  $table->timestamps();
});

and don't forget to setup your Models too.

Step 2: Media-Upload installation

You can install media-upload via npm:

$ npm install @s1modev/media-upload

or via yarn

$ yarn add @s1modev/media-upload

after the installation you can import it on your app.js file

require('./bootstrap');

import { createApp } from 'vue';

import { UploadMedia, UpdateMedia } from '@s1modev/media-upload';

let app=createApp({})

app.component('upload-media' , UploadMedia);
app.component('update-media' , UpdateMedia);

app.mount("#app")

Step 3: Create/Add form

In our create.blade.php we will create two inputs and use the <upload-media/> component

<form action="{{route('post.create')}}" method="post">
  @csrf
  <div class="form-group">
    <label for="">Title</label>
    <input type="text" name="title" class="form-control @error('title') is-invalid @enderror" value="{{old('title')}}
  </div>
  <div class="form-group mt-3">
    <label for="">Description</label>
    <textarea name="description" rows="4" class="form-control @error('title') is-invalid @enderror">{{old('description')}}</textarea>
  </div>
  <div class="mt-3">
    <label for="" class="m-0">Media</label>
      <div id="app">
        <upload-media 
          server='/api/upload'
          error="@error('media'){{$message}}@enderror">
        </upload-media>
      </div>
    </div>
    <button class="btn btn-primary text-white mt-4">Submit</button>
</form>

Usage

Now we will need to add this line in our api.php

//upload image
Route::post('/upload', [ImageController::class, 'store'])->name('upload');

In the ImageController we will create a function store() that temporary stores the uploaded image in tmp\uploads.

public function store(Request $request){
  $path = public_path('tmp/uploads');

  if (!file_exists($path)) {
    mkdir($path, 0777, true);
  }

  $file = $request->file('image');

  $name = uniqid() . '_' . trim($file->getClientOriginalName());

  $file->move($path, $name);

  return ['name'=>$name];
}

store() function will give the uploaded image a unique name and stores it in tmp/upload, and will return the unique name to <upload-media /> component so it could continue its work.

Create Post Controller

Setting up the web.php

Route::get('/post/create', [PostController\Create::class, 'index']);
Route::post('/post/create', [PostController\Create::class, 'store'])->name('post.create');

And in our create controller PostController/Create.php this is how the store() function looks like

public function store(Request $request){

  $this->validate($request,[
    'title'=>'required',
    'description'=>'required',
    'media'=>'required',
  ]);

  $post = Post::create([
    'title'=>$request->title,
    'description'=>$request->description,
  ]);

  foreach($request->media as $image){     
    $from = public_path('tmp/uploads/'.$image);
    $to = public_path('post_images/'.$image);

    File::move($from, $to);
    $post->images()->create([
      'name' => $image,
    ]);
  }

  $posts = Post::get();
  return redirect()->route('post.dashboard', ['posts'=>$posts]);
}

This code simply store the post and uses the unique images names to move the added images from the temporary location /tmp/uploads file to its final location /post_images.

Note that tmp/uploads and /post_images directories need to be created!

Step 4: Update/Edit form

In the update form update.blade.php we will need to use the second component <update-media/>

<form action="{{route('post.update', $post->id)}}" method="post">
  @csrf
    <div class="form-group">
      <label for="">Title</label>
      <input type="text" name="title" class="form-control" value="{{$post->title}}" required>
    </div>
    <div class="form-group mt-3">
      <label for="">Description</label>
      <textarea name="description" rows="4" class="form-control" required>{{$post->description}}</textarea>
    </div>
    <div class="mt-3" id="app">
      <update-media 
        server='/api/upload' 
        media_file_path='/post_images'
        media_server="/api/media/{{$post->id}}" 
        error="@error('media'){{$message}}@enderror">
      </update-media>
    </div>
    <button class="btn btn-primary text-white mt-4">Save</button>
</form>

will need the saved images names to preview it, so don't forget to add this line in the api.php

//return post images
Route::post('/media/{post}', [ImageController::class, 'getImages'])->name('post.images');

and also we should add the getImages function in our ImageController

public function getImages(Post $post){
  $images = $post->images;
  return ['media'=>$images];
}

Update post controller

we will need to add this two line in our web.php

Route::get('/post/update/{post}',[PostController\Update::class, 'index']);
Route::post('/post/update/{post}',[PostController\Update::class, 'update'])->name('post.update');

And finally we will need an update() function in our PostController/Update.php

public function update(Post $post, Request $request){
  $this->validate($request,[
    'title'=>'required',
    'description'=>'required',
    'media'=>'required',
  ]);

  $post->update($request->all());

  if(isset($request->added_media)){
    foreach($request->added_media as $image){

      $from = public_path('tmp/uploads/'.$image);
      $to = public_path('post_images/'.$image);

      File::move($from, $to);
      $post->images()->create([
        'name' => $image,
      ]);
    }
  }

  if(isset($request->deleted_media)){
    foreach($request->deleted_media as $deleted_media){
      File::delete(public_path('post_images/'.$deleted_media));
      Image::where('name', $deleted_media)->delete();
    }
  }

  $posts = Post::get();
  return redirect()->route('post.dashboard', ['posts'=>$posts]);
}

this function basically add the added images and delete the deleted image.

You will find this project in this repository

Homework

In the situation when a user upload the images on the form but leave the form before the final submit, the temporary images are still stored on the server and won't get moved or deleted.

well it’s up to you how to deal with this situation, but I recommend you to schedule an artisan command using Laravel scheduling to cleanup all those images that have not been used. 


https://dev.to/simodev/how-to-upload-multiple-images-with-preview-using-laravel-and-vue-282j


Deploy Laravel Project with Apache on Ubuntu

 Hello Developers,

Laravel is a free and open-source PHP framework based on the Symfony framework and follows the Model-View-Controller design pattern. It comes with tools and resources that help you build robust and modern PHP applications. It offers a rich set of features, including Eloquent ORM, Support MVC Architecture, Template Engine, Libraries & Modular, Multiple back-ends for session and cache storage, and more.

Laravel powered millions of applications on the internet. But there are very few articles on the internet explaining how you can deploy the Laravel application with Apache on the Ubuntu server.

1. Prerequisites

  • The operating system running Ubuntu Linux
  • A root or non-root user with Sudo privileges
  • Has stable internet connection
  • Terminal window / Command line

2. Install Apache On Ubuntu

If you have installed Apache, you can skip this. If you have not installed Apache, then you click on this link: Install Apache on Ubuntu 20.04 LTS

3. Install Composer On Ubuntu

There are a few steps that we can follow to deploy Laravel on Apache. The first one is to install all the required dependencies on the server. The second is to clone the git repository or create a new Laravel project inside our project directory.
So, Let's get started with the first step.

If we are going to clone a git repo, we have to install git on our server. It is straightforward. And, we also have to install composer on the server because we have to install Laravel's dependencies using composer update or composer install command. So, Let's, first of all, install the git and composer on our server.

Execute the following commands to install git and composer on the Ubuntu server.

sudo apt-get update
sudo apt-get install git composer -y

4. Install Laravel

Option 1: Clone a Git Repository

Git is a free and open-source distributed version control system designed to handle small and extensive projects with speed and efficiency.

Git is the most popular version control system developed by Linux itself, Linus Torvalds. It is straightforward to use, and millions of developers worldwide use git to manage different versions of their code. If you are working your Laravel code with git, go to your site's document root on your server and execute the git clone command.

I will deploy it inside the default document root of the Apache webserver. It means that I will navigate to /var/www/html and execute the git clone command, just like this.

cd /var/www/html
git clone https://github.com/laravel/laravel.git .
composer install

For example, I am cloning the Laravel project from the official git repository of Laravel. You can clone your project from the repository you desire. Just replace the URL, and you are good to go. We added the "." at the end of the git clone command to clone the project files in the same directory.

Option 2: Deploy a new Laravel Project

If you choose the first option, you can skip this second option. But if you want to deploy a brand new Laravel project on your server, you can use the composer. Execute the following commands in your DocumentRoot to deploy a new Laravel project.

cd /var/www/html
composer create-project --prefer-dist laravel/laravel .

5. Update ENV File and Generate An Encryption Key

To copy the file from .env.example to .env and generate an encryption key, run the following commands.

cd /var/www/html
cp .env.example .env
php artisan key:generate

Next, edit the .env file and define your database:

cd /var/www/html
nano .env

Change the following lines:

APP_URL=https://techvblogs.com

DB_CONNECTION=mysql
DB_HOST=YOUR_DB_HOST
DB_PORT=3306
DB_DATABASE=techvblogs
DB_USERNAME=admin
DB_PASSWORD=YOUR_PASSWORD

After updating your .env file, press CTRL+X, Y, and Enter key to save the .env file.

6. Configure Apache for Laravel

Laravel is tricky. It is because the main index.php file of the project lives in the project's public directory. It means that we have to update our virtual host so that it should route the traffic into the public directory inside our project directory.

Next, We will need to create an Apache virtual host configuration file for Laravel. Run the following command:

sudo nano /etc/apache2/sites-available/techvblogs.conf

Add the following lines:

<VirtualHost *:80>

    ServerAdmin admin@techvblogs.com
    ServerName techvblogs.com
    DocumentRoot /var/www/html/public

    <Directory /var/www/html/public>
       Options +FollowSymlinks
       AllowOverride All
       Require all granted
    </Directory>

    ErrorLog ${APACHE_LOG_DIR}/error.log
    CustomLog ${APACHE_LOG_DIR}/access.log combined

</VirtualHost>

After updating your virtual host file, press CTRL+X, Y, and Enter key to save the updated virtual host file.

Next, activate the Apache rewrite module and Laravel virtual host configuration using the following command.

sudo a2enmod rewrite
sudo a2ensite techvblogs.conf

Finally, restart the Apache server to apply the changes. Run the following command:

sudo service apache2 restart

If your Apache server successfully restarts, you will be able to access your Laravel project in the browser.

Thank you for reading this blog.

https://dev.to/sureshramani/how-to-deploy-laravel-project-with-apache-on-ubuntu-36p3

Sunday, January 2, 2022

Customize Laravel Jetstream (Registration and Login)

Hello, welcome back to my series, previously, I wrote on how to Customize Laravel Auth (Laravel Breeze Registration and Login), this is for those that use Laravel breeze for Authentification, but some of my readers who used Laravel Jetstream are still finding it difficult to customize the Registration and Login process in order to suit their needs.

For those that did not read the previous article, what we are trying to achieve is to customize the Registration and Login whereby a developer can choose to use username and password for login different from the default email and password, this is because some of the users of your application might not be having email address, so the person might use username for the registration and be using it for login.
without further ado, let's dive into the stuff of the day, if you read Customize Laravel Auth (Laravel Breeze Registration and Login), most of the steps are similar.

Click on my profile to follow me to get more updates.

Step 1: Edit the CreateNewUser.php

If you scaffold your authentication using Laravel Jetstream and installed livewire or inertia, you will have an Action folder in your App directory, and also a Fortify directory inside the Action with some files.
Go to app/Actions/Fortify/CreateNewUser.php customize the create method to this

  public function create(array $input)
    {
        Validator::make($input, [
            'firstname' => ['required', 'string', 'max:255'],
            'lastname' => ['required', 'string', 'max:255'],
            'username' => ['required', 'string', 'max:255'],
            'password' => $this->passwordRules(),
        ])->validate();

        return User::create([
            'firstname' => $input['firstname'],
            'lastname' => $input['lastname'],
            'username' => $input['username'],
            'email' => $input['email'],
            'password' => Hash::make($input['password']),
        ]);
    }

In the validate( ) method, I removed email, and added firstnamelastname and username. Also in the User::create, I added the new fields.

Step 2: Create another migration file to add the new fields to the User table

php artisan make:migration add_more_fields_to_users_table --table=users

A migrations file will be created, go to database/migrations/Migration files

Step 3: Add the new fields and modify the name field

We are going to modify the existing name field with firstname and also add other fields, but to modify an existing fields, we need a package doctrine/dbal, The Doctrine DBAL library is used to determine the current state of the column and to create the SQL queries needed to make the requested changes to your column. Laravel docs

composer require doctrine/dbal

After this, update the composer, by running the command below

composer update

php artisan command
Then add the following fields to the up( ) method of the migration file created above

    public function up()
    {
        Schema::table('users', function (Blueprint $table) {
            $table->renameColumn('name', 'firstname');
            $table->string('lastname');
            $table->string('username')->unique();
            $table->string('email')->nullable()->change();
        });
    }

You will notice how we are going to rename our name field to firstname and added lastname and username, we made the username to be unique() and also modify email from mandatory to nullable().

Finally, run the migration command

php artisan migrate

php artisan migrate
Database
Database

Step 4: Modify the Users Model

We need to add the fields to be fill in users model, go to app/Models/User.php and edit the protected $fillable to add the new fields

    protected $fillable = [
        'firstname',
        'email',
        'password',
        'username',
        'lastname'
    ];

Step 5: Modify the Registration view

Go to resources/views/auth/register.blade.php and modify to this

<x-guest-layout>
    <x-jet-authentication-card>
        <x-slot name="logo">
            <x-jet-authentication-card-logo />
        </x-slot>

        <x-jet-validation-errors class="mb-4" />

        <form method="POST" action="{{ route('register') }}">
            @csrf

            <div>
                <x-jet-label value="{{ __('First Name') }}" />
                <x-jet-input class="block mt-1 w-full" type="text" name="firstname" :value="old('firstname')" required autofocus autocomplete="firstname" />
            </div>

            <div>
                <x-jet-label value="{{ __('Last Name') }}" />
                <x-jet-input class="block mt-1 w-full" type="text" name="lastname" :value="old('lastname')" required autocomplete="lastname" />
            </div>

            <div>
                <x-jet-label value="{{ __('Username') }}" />
                <x-jet-input class="block mt-1 w-full" type="text" name="username" :value="old('username')" autocomplete="username" />
            </div>

            <div class="mt-4">
                <x-jet-label value="{{ __('Email') }}" />
                <x-jet-input class="block mt-1 w-full" type="email" name="email" :value="old('email')"  />
            </div>

            <div class="mt-4">
                <x-jet-label value="{{ __('Password') }}" />
                <x-jet-input class="block mt-1 w-full" type="password" name="password" required autocomplete="new-password" />
            </div>

            <div class="mt-4">
                <x-jet-label value="{{ __('Confirm Password') }}" />
                <x-jet-input class="block mt-1 w-full" type="password" name="password_confirmation" required autocomplete="new-password" />
            </div>

            <div class="flex items-center justify-end mt-4">
                <a class="underline text-sm text-gray-600 hover:text-gray-900" href="{{ route('login') }}">
                    {{ __('Already registered?') }}
                </a>

                <x-jet-button class="ml-4">
                    {{ __('Register') }}
                </x-jet-button>
            </div>
        </form>
    </x-jet-authentication-card>
</x-guest-layout>

Start our application with

php artisan serve

Click on Register, we are going to have this
register

Step 6: Modify the Login view

Go to resources/views/auth/login.blade.php and modify to this

<x-guest-layout>
    <x-jet-authentication-card>
        <x-slot name="logo">
            <x-jet-authentication-card-logo />
        </x-slot>

        <x-jet-validation-errors class="mb-4" />

        @if (session('status'))
        <div class="mb-4 font-medium text-sm text-green-600">
            {{ session('status') }}
        </div>
        @endif

        <form method="POST" action="{{ route('login') }}">
            @csrf

            <div>
                <x-jet-label value="{{ __('Username') }}" />
                <x-jet-input class="block mt-1 w-full" type="text" name="username" :value="old('username')" required autofocus />
            </div>

            <div class="mt-4">
                <x-jet-label value="{{ __('Password') }}" />
                <x-jet-input class="block mt-1 w-full" type="password" name="password" required autocomplete="current-password" />
            </div>

            <div class="block mt-4">
                <label class="flex items-center">
                    <input type="checkbox" class="form-checkbox" name="remember">
                    <span class="ml-2 text-sm text-gray-600">{{ __('Remember me') }}</span>
                </label>
            </div>

            <div class="flex items-center justify-end mt-4">
                @if (Route::has('password.request'))
                <a class="underline text-sm text-gray-600 hover:text-gray-900" href="{{ route('password.request') }}">
                    {{ __('Forgot your password?') }}
                </a>
                @endif

                <x-jet-button class="ml-4">
                    {{ __('Login') }}
                </x-jet-button>
            </div> 
        </form>
    </x-jet-authentication-card>
</x-guest-layout>

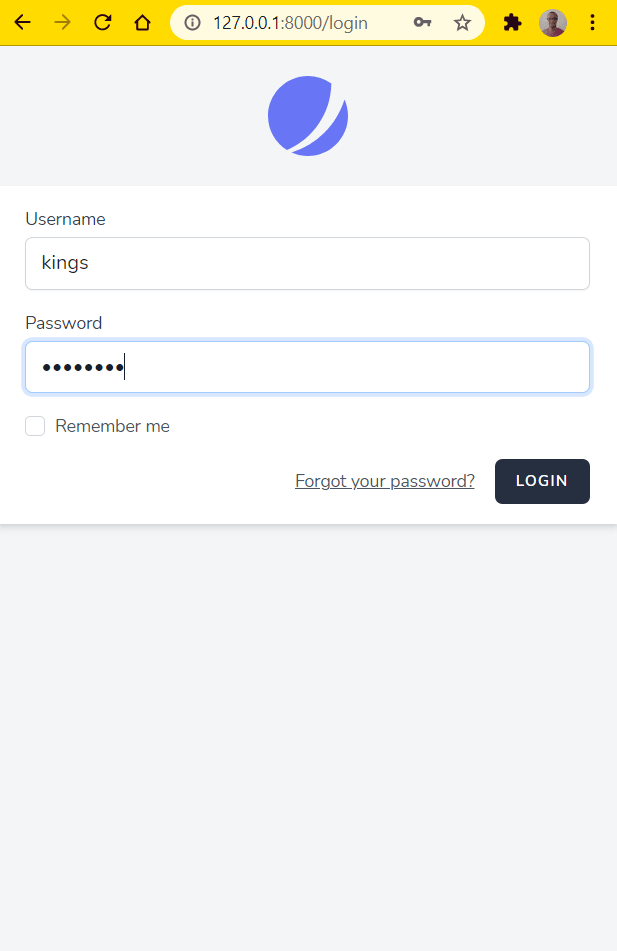
We removed email field and replace it with username field

Step 7: Modify the Fortify configuration file

We are going to specify what we are going to be using for the login, so go to config/fortify.php, you will see an array, find the username key and change it to username from email,

  'username' => 'username',

Then clear your config and cache

php artisan config:cache

Run your app in case it is down

php artisan serve

Login page
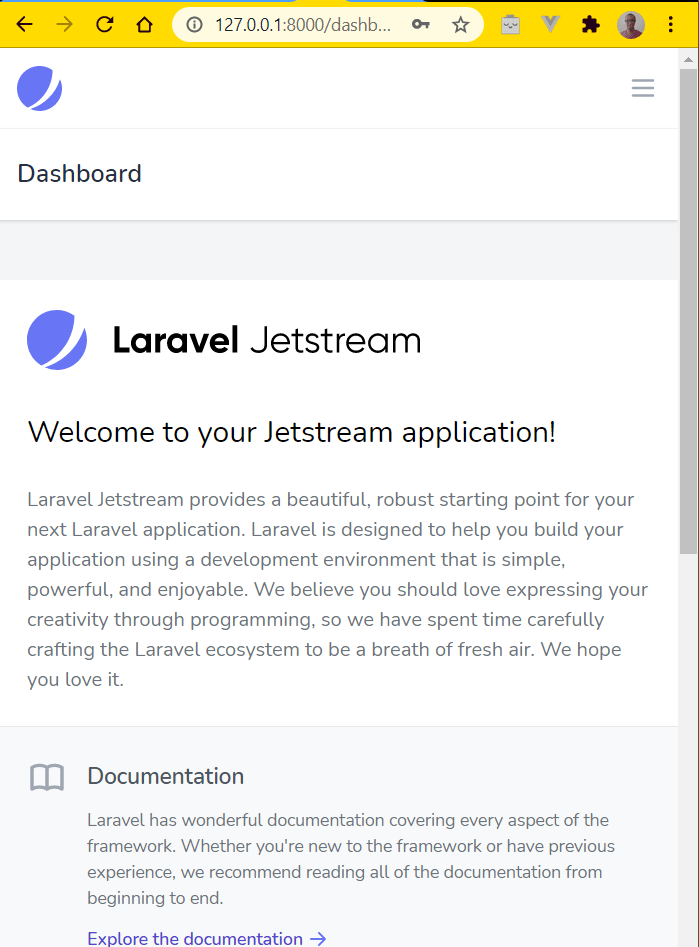
Dashboard after login

We can now login with username and password instead of email address. That is all
Follow me for more of my articles, you can leave comments, suggestions, and reactions.

I am open to any vacancy as a PHP backend engineer, my strength is in the Laravel framework. 


https://dev.to/kingsconsult/customize-laravel-jetstream-registration-and-login-210f

virtual host by package ubuntu

 https://www.itsolutionstuff.com/post/how-to-create-quick-apache-virtual-host-in-ubuntuexample.html