https://mega.nz/file/bCJ3DABI#Vuf_xYb0WdLqzfPGe1qtNaNyve_NCWJHMLNgyU7MhuI
Monday, December 28, 2020
This keyword in vue js regular function vs arrow function
How to fix "this is undefined" in Vue
September 2018
You're happily coding along, loving how awesome Vue is, when it strikes.

Your VueJS app doesn't work, and you get an error that says:
this is undefined
Don't worry, you're not alone — I've run into this issue countless times, and I'll show you just how to solve it.
The likely cause of this is that you're mixing up your usage of regular functions and arrow functions. My guess is that you're using an arrow function. If you replace the arrow function with a regular function it will probably fix the issue for you.
But let's go a little further and try to understand why this works.
After all, knowledge is power, and if you know what caused your problem, you'll be able to avoid a lot of frustration and wasted time in the future.
There are also a few other places where you can get tripped up with this error:
- Fetching data using
fetchoraxios - Using libraries like
lodashorunderscore
I'll cover these as well, and how to do them properly.
Understanding the two main types of functions
In Javascript we get two different kinds of functions. They operate in almost identical ways, except they differ in how they treat the variable this.
This causes a ton of confusion for new and old Javascript devs alike — but by the time we're through you won't be caught by this one anymore.
Regular functions
A regular function can be defined in a few different ways.
The first way is less common in Vue components, because it's a bit longer to write out:
methods: {
  regularFunction: function() {
    // Do some stuff
  }
}
The second way is the shorthand function, which is probably more familiar to you:
methods: {
  shorthandFunction() {
    // Do some stuff
  }
}
In a regular function like this one, this will refer to the "owner" of the function. Since we're defining it on the Vue component, this refers to your Vue component. I'll explain how this scoping works in more detail later on.
In most cases you should use a regular function with Vue, especially when creating:
- methods
- computed props
- watched props
While regular functions are usually what you need, arrow functions come in very handy as well.
Arrow functions
Arrow functions can be even shorter and quicker to write, and have gained lots of popularity recently because of this. However, they aren't too different when defining a method on an object like we are doing when writing Vue components.
This is what they look like on a Vue component:
methods: {
  arrowFunction: () => {
    // Do some stuff
  }
}
The real differences start to come in to play when dealing with how this works.
In an arrow function, this does not refer to the owner of the function.
An arrow function uses what is called lexical scoping. We'll get into this more in a bit, but it basically means that the arrow function takes this from it's context.
If you try to access this from inside of an arrow function that's on a Vue component, you'll get an error because this doesn't exist!
data() {
  return {
    text: 'This is a message',
  };
},
methods: {
  arrowFunction: () => {
    console.log(this.text);  // ERROR! this is undefined
  }
}
So in short, try to avoid using arrow functions on Vue components. It will save you a lot of headaches and confusion.
There are times when it's nice to use a short arrow function. But this only works if you aren't referencing this:
computed: {
  location: () => window.location,
}
Now that we know the two main types of functions, how do we use them in the correct way?
Anonymous Functions
Anonymous functions are great for when you just need to create a quick function and don't need to call it from anywhere else. They're called anonymous because they aren't given a name, and aren't tied to a variable.
Here are some scenarios where you'd use an anonymous function:
- Fetching data using
fetchoraxios - Functional methods like
filter,map, andreduce - Anywhere else inside of Vue methods
I'll show you what I mean:
// Fetching data
fetch('/getSomeData').then((data) => {
  this.data = data;
});

// Functional methods
const array = [1, 2, 3, 4, 5];
const filtered = array.filter(number => number > 3);
const mapped = array.map(number => number * 2);
const reduced = array.reduce((prev, next) => prev + next);
As you can see from the examples, most of the time when people create anonymous functions they use arrow functions. We typically use arrow functions for several reasons:
- Shorter and more condensed syntax
- Improved readability
thisis taken from the surrounding context
Arrow functions also work great as anonymous functions inside of Vue methods.
But wait, didn't we just figure out that arrow functions don't work when we try to access this?
Ah, but here is where the distinction is.
When we use arrow functions inside a regular or shorthand function, the regular function sets this to be our Vue component, and the arrow function uses that this (say that 5 times fast!).
Here's an example:
data() {
  return {
    match: 'This is a message',
  };
},
computed: {
  filteredMessages(messages) {
    console.log(this); // Our Vue component

    const filteredMessages = messages.filter(
      // References our Vue Component
      (message) => message.includes(this.match)
    );

    return filteredMessages;
  }
}
Our filter can access this.match because the arrow function uses the same context that the method filteredMessages uses. This method, because it is a regular function (and not an arrow function), sets it's own context to be the Vue instance.
Let's expand further on how you would this to fetch data using axios or fetch.
Using the right function when fetching data
If you're fetching async data using fetch or axios, you're also using promises. Promises love anonymous arrow functions, and they also make working with this a lot easier.
If you're fetching some data and want to set it on your component, this is how you'd do that properly:
export default {
  data() {
    return {
      dataFromServer: undefined,
    };
  },
  methods: {
    fetchData() {
      fetch('/dataEndpoint')
        .then(data => {
          this.dataFromServer = data;
        })
        .catch(err => console.error(err));
    }
  }
};
Notice how we're using a regular function as the method on the Vue component, and then using anonymous arrow functions inside of the promise:
.then(data => {
  this.dataFromServer = data;
})
Inside of the scope for fetchData(), we have that this is set to our Vue component because it is a regular function. Since arrow functions use the outer scope as their own scope, the arrow functions also set this to be our Vue component.
This allows us to access our Vue component through this and update dataFromServer.
But what if you need to pass functions to a helper library, like lodash or underscore?
Using with Lodash or Underscore
Let's say that you have a method on your Vue component that you want to debounce using Lodash or Underscore. How do you prevent those pesky this is undefined errors here?
If you come from the React world, you've probably seen something similar to this.
Here is how we would do it in Vue:
created() {
  this.methodToDebounce = _.debounce(this.methodToDebounce, 500);
},
methods: {
  methodToDebounce() {
    // Do some things here
  }
}
That's it!
All we're doing is taking our function, wrapping it in the debounce function, and returning a new one that has the debouncing built in. Now when we call this.methodToDebounce() on our Vue component we will be calling the debounced version!
What is lexical scoping?
So I promised that I would explain this more clearly, so here it is.
As I mentioned before, the main reason that there is a difference between regular functions and arrow functions has to do with lexical scoping.

Let's break down what it means. We'll work in reverse order.
First, a scope is any area of the program where a variable exists. In Javascript, the window variable has global scope — it's available everywhere. Most variables though are limited to the function they are defined in, the class they are a part of, or limited to a module.
Second, the word "lexical" just means that the scope is determined by how you write the code. Some programming languages will determine what is in scope only once the program is running. This can get really confusing, so most languages just stick with lexical scoping.
Arrow functions use lexical scoping, but regular and shorthand functions do not.
The trickiest part here is how lexical scoping affects this in your functions. For arrow functions, this is bound to the same this of the outer scope. Regular functions have some weirdness to how they bind this, which is why arrow functions were introduced, and why most people try and use arrow functions as much as possible.
Examples of how scope works in functions
Here are some examples to illustrate how scope works differently between the two function types:
// This variable is in the window's scope
window.value = 'Bound to the window';

const object = {
  // This variable is in the object's scope
  value: 'Bound to the object',
  arrowFunction: () => {
    // The arrow function uses the window's scope for `this`
    console.log(this.value); // 'Bound to the window'
  },
  regularFunction() {
    // The regular function uses the object's scope for `this`
    console.log(this.value);  // 'Bound to the object'
  }
};
Now you know a bit about how scope is bound to functions in Javascript!
But there is a way to override this default behaviour and do it all yourself...
Binding scope to a function
Did you know that you can actually override how this is bound and provide your own this to a function?
You need to use the bind method on the function:
const boundFunction = unboundFunction.bind(this);
This gives you much greater flexibility in writing Vue components, and let's you reuse your methods more easily.
It's a bit more advanced in it's usage, so you should try to avoid using it too often.
Sunday, December 27, 2020
Adding Video Chat To Your Laravel App
Link: https://dev.to/mupati/adding-video-chat-to-your-laravel-app-5ak7
Adding Video Chat To Your Laravel App
 ・Updated on ・11 min read
Introduction
I was required to build a custom video chat application for a Vuejs and Laravel project. I went through a lot of hoops to get it working. I will share all that I learnt throughout the process over here.
Final Project Repository: https://github.com/Mupati/laravel-video-chat
Requirements
This tutorial assumes you know how to set up a new
Laravelproject withVueJsauthentication. Create some users after setting up your project. You should be familiar with Laravel's broadcasting mechanism and have a fair idea of how WebSockets work.Set up a free pusher account on pusher.com
Set up your ICE SERVER (TURN SERVER) details. This tutorial is a good guide. HOW TO INSTALL COTURN.
Project Setup
# Install needed packages
composer require pusher/pusher-php-server "~4.0"
npm install --save laravel-echo pusher-js simple-peer
Configuring Backend
- Add routes for video page in
routes/web.php. The routes will be used to visit the video call page, make calls and receive calls.
Route::get('/video-chat', function () {
    // fetch all users apart from the authenticated user
    $users = User::where('id', '<>', Auth::id())->get();
    return view('video-chat', ['users' => $users]);
});

// Endpoints to call or receive calls.
Route::post('/video/call-user', 'App\Http\Controllers\VideoChatController@callUser');
Route::post('/video/accept-call', 'App\Http\Controllers\VideoChatController@acceptCall');
- Uncomment
BroadcastServiceProviderinconfig/app.php. This allows us to use Laravel's broadcasting system.
+ App\Providers\BroadcastServiceProvider::class
- //App\Providers\BroadcastServiceProvider::class
- Create a Presence Channel for the Video Chat Application in
routes/channels.php. When an authenticated user subscribes to the channel (presence-video-channel), we return the users'sidandname. This is how we are able to get the user who is logged in and can be called.
Broadcast::channel('presence-video-channel', function($user) {
    return ['id' => $user->id, 'name' => $user->name];
});
- Create
StartVideoChatevent.This event will be called when placing a call or accepting a call and it will broadcast on the presence-video-call channel. Users subscribed to the channel will be listening to this event on the frontend so that incoming call notifications can be triggered.
php artisan make:event StartVideoChat
- Add the following code to
app/Events/StartVideoChat.php. The StartVideoChat event broadcasts topresence-video-channelso that the data needed to initiate the video call is shared on the channel.
<?php

namespace App\Events;

use Illuminate\Broadcasting\InteractsWithSockets;
use Illuminate\Broadcasting\PresenceChannel;
use Illuminate\Contracts\Broadcasting\ShouldBroadcast;
use Illuminate\Foundation\Events\Dispatchable;
use Illuminate\Queue\SerializesModels;

class StartVideoChat implements ShouldBroadcast
{
    use Dispatchable, InteractsWithSockets, SerializesModels;

    public $data;
    /**
     * Create a new event instance.
     *
     * @return void
     */
    public function __construct($data)
    {
        $this->data = $data;
    }

    /**
     * Get the channels the event should broadcast on.
     *
     * @return \Illuminate\Broadcasting\Channel|array
     */
    public function broadcastOn()
    {
        return new PresenceChannel('presence-video-channel');
    }
}
- Create
VideoChatControllerto make and accept calls.
php artisan make:controller VideoChatController
- Add the following to the
VideoChatController
<?php

namespace App\Http\Controllers;

use Illuminate\Support\Facades\Auth;
use Illuminate\Http\Request;
use App\Events\StartVideoChat;

class VideoChatController extends Controller
{

    public function callUser(Request $request)
    {
        $data['userToCall'] = $request->user_to_call;
        $data['signalData'] = $request->signal_data;
        $data['from'] = Auth::id();
        $data['type'] = 'incomingCall';

        broadcast(new StartVideoChat($data))->toOthers();
    }
    public function acceptCall(Request $request)
    {
        $data['signal'] = $request->signal;
        $data['to'] = $request->to;
        $data['type'] = 'callAccepted';
        broadcast(new StartVideoChat($data))->toOthers();
    }
}
Methods in the VideoChatController
One thing to understand is that the VideoChat Application is a realtime application that works with web sockets. The endpoints are just needed to establish the link between the 2 calling parties after which the communication data is exchanged via websockets.
Let's try to understand what the 2 methods in the Controller are doing:
callUser Method
user_to_call:idof the user the initiator of the call wants to reach.signal_data: The initial signal data (offer) sent by the caller from the webrtc client (simple-peerjs is the webrtc wrapper we are using). These are the parameters received. We create adataobject with 2 additional properties,fromandtypethen broadcast the data with theStartVideoChatevent which will be listened to on the frontend.from: is theidof the user placing the call. We use the authenticated user's id.type: is a property of the data which will indicate that there is an incoming call on the channel. The notification will be shown to the user whoseidcorresponds to the value ofuser_to_call.
acceptCall Method
signal: This is the callee'sanswerdata.to: The caller's of the call'sid. The signal data for the answered call is sent to the user whose id matchestoand this is supposed to be the caller's id.type: A property added to the data to be sent over the channel indicating that the call recipient has accepted the call.
Configuring Frontend
- Instantiate
Laravel EchoandPusherinresources/js/bootstrap.jsby uncommenting the following block of code.
+ import Echo from 'laravel-echo';
+ window.Pusher = require('pusher-js');
+ window.Echo = new Echo({
+     broadcaster: 'pusher',
+     key: process.env.MIX_PUSHER_APP_KEY,
+     cluster: process.env.MIX_PUSHER_APP_CLUSTER,
+     forceTLS: true
+ });
- import Echo from 'laravel-echo';
- window.Pusher = require('pusher-js');
- window.Echo = new Echo({
-     broadcaster: 'pusher',
-     key: process.env.MIX_PUSHER_APP_KEY,
-     cluster: process.env.MIX_PUSHER_APP_CLUSTER,
-     forceTLS: true
-});
- Create
resources/js/helpers.js. Add agetPermissionsfunction to help with permission access for microphone and videos. This method handles the video and audio permission that is required by browsers to make the video calls. It waits for the user to accept the permissions before we can proceed with the video call. We allow both audio and video. Read more on MDN Website.
export const getPermissions = () => {
    // Older browsers might not implement mediaDevices at all, so we set an empty object first
    if (navigator.mediaDevices === undefined) {
        navigator.mediaDevices = {};
    }

    // Some browsers partially implement mediaDevices. We can't just assign an object
    // with getUserMedia as it would overwrite existing properties.
    // Here, we will just add the getUserMedia property if it's missing.
    if (navigator.mediaDevices.getUserMedia === undefined) {
        navigator.mediaDevices.getUserMedia = function(constraints) {
            // First get ahold of the legacy getUserMedia, if present
            const getUserMedia =
                navigator.webkitGetUserMedia || navigator.mozGetUserMedia;

            // Some browsers just don't implement it - return a rejected promise with an error
            // to keep a consistent interface
            if (!getUserMedia) {
                return Promise.reject(
                    new Error("getUserMedia is not implemented in this browser")
                );
            }

            // Otherwise, wrap the call to the old navigator.getUserMedia with a Promise
            return new Promise((resolve, reject) => {
                getUserMedia.call(navigator, constraints, resolve, reject);
            });
        };
    }
    navigator.mediaDevices.getUserMedia =
        navigator.mediaDevices.getUserMedia ||
        navigator.webkitGetUserMedia ||
        navigator.mozGetUserMedia;

    return new Promise((resolve, reject) => {
        navigator.mediaDevices
            .getUserMedia({ video: true, audio: true })
            .then(stream => {
                resolve(stream);
            })
            .catch(err => {
                reject(err);
                //   throw new Error(`Unable to fetch stream ${err}`);
            });
    });
};
- Create a Video Chat Component,
resources/js/components/VideoChat.vue.
<template>
<div>
<div class="container">
<div class="row">
<div class="col">
<div class="btn-group" role="group">
<button
type="button"
class="btn btn-primary mr-2"
v-for="user in allusers"
:key="user.id"
@click="placeVideoCall(user.id, user.name)"
>
Call {{ user.name }}
<span class="badge badge-light">{{
getUserOnlineStatus(user.id)
}}</span>
</button>
</div>
</div>
</div>
<!--Placing Video Call-->
<div class="row mt-5" id="video-row">
<div class="col-12 video-container" v-if="callPlaced">
<video
ref="userVideo"
muted
playsinline
autoplay
class="cursor-pointer"
:class="isFocusMyself === true ? 'user-video' : 'partner-video'"
@click="toggleCameraArea"
/>
<video
ref="partnerVideo"
playsinline
autoplay
class="cursor-pointer"
:class="isFocusMyself === true ? 'partner-video' : 'user-video'"
@click="toggleCameraArea"
v-if="videoCallParams.callAccepted"
/>
<div class="partner-video" v-else>
<div v-if="callPartner" class="column items-center q-pt-xl">
<div class="col q-gutter-y-md text-center">
<p class="q-pt-md">
<strong>{{ callPartner }}</strong>
</p>
<p>calling...</p>
</div>
</div>
</div>
<div class="action-btns">
<button type="button" class="btn btn-info" @click="toggleMuteAudio">
{{ mutedAudio ? "Unmute" : "Mute" }}
</button>
<button
type="button"
class="btn btn-primary mx-4"
@click="toggleMuteVideo"
>
{{ mutedVideo ? "ShowVideo" : "HideVideo" }}
</button>
<button type="button" class="btn btn-danger" @click="endCall">
EndCall
</button>
</div>
</div>
</div>
<!-- End of Placing Video Call -->
<!-- Incoming Call -->
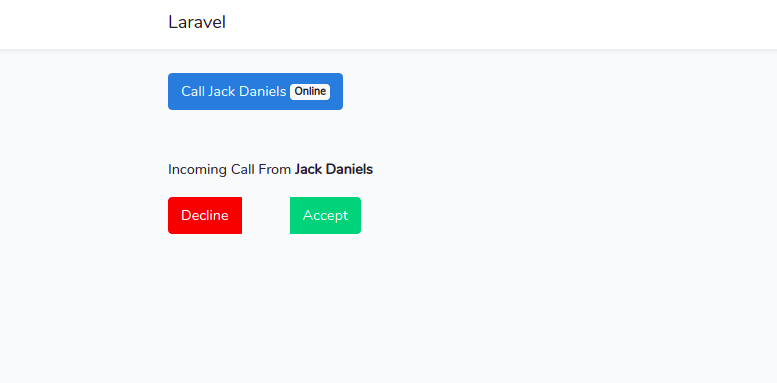
<div class="row" v-if="incomingCallDialog">
<div class="col">
<p>
Incoming Call From <strong>{{ callerDetails.name }}</strong>
</p>
<div class="btn-group" role="group">
<button
type="button"
class="btn btn-danger"
data-dismiss="modal"
@click="declineCall"
>
Decline
</button>
<button
type="button"
class="btn btn-success ml-5"
@click="acceptCall"
>
Accept
</button>
</div>
</div>
</div>
<!-- End of Incoming Call -->
</div>
</div>
</template>
<script>
import Peer from "simple-peer";
import { getPermissions } from "../helpers";
export default {
props: [
"allusers",
"authuserid",
"turn_url",
"turn_username",
"turn_credential",
],
data() {
return {
isFocusMyself: true,
callPlaced: false,
callPartner: null,
mutedAudio: false,
mutedVideo: false,
videoCallParams: {
users: [],
stream: null,
receivingCall: false,
caller: null,
callerSignal: null,
callAccepted: false,
channel: null,
peer1: null,
peer2: null,
},
};
},
mounted() {
this.initializeChannel(); // this initializes laravel echo
this.initializeCallListeners(); // subscribes to video presence channel and listens to video events
},
computed: {
incomingCallDialog() {
if (
this.videoCallParams.receivingCall &&
this.videoCallParams.caller !== this.authuserid
) {
return true;
}
return false;
},
callerDetails() {
if (
this.videoCallParams.caller &&
this.videoCallParams.caller !== this.authuserid
) {
const incomingCaller = this.allusers.filter(
(user) => user.id === this.videoCallParams.caller
);
return {
id: this.videoCallParams.caller,
name: `${incomingCaller[0].name}`,
};
}
return null;
},
},
methods: {
initializeChannel() {
this.videoCallParams.channel = window.Echo.join("presence-video-channel");
},
getMediaPermission() {
return getPermissions()
.then((stream) => {
this.videoCallParams.stream = stream;
if (this.$refs.userVideo) {
this.$refs.userVideo.srcObject = stream;
}
})
.catch((error) => {
console.log(error);
});
},
initializeCallListeners() {
this.videoCallParams.channel.here((users) => {
this.videoCallParams.users = users;
});
this.videoCallParams.channel.joining((user) => {
// check user availability
const joiningUserIndex = this.videoCallParams.users.findIndex(
(data) => data.id === user.id
);
if (joiningUserIndex < 0) {
this.videoCallParams.users.push(user);
}
});
this.videoCallParams.channel.leaving((user) => {
const leavingUserIndex = this.videoCallParams.users.findIndex(
(data) => data.id === user.id
);
this.videoCallParams.users.splice(leavingUserIndex, 1);
});
// listen to incomming call
this.videoCallParams.channel.listen("StartVideoChat", ({ data }) => {
if (data.type === "incomingCall") {
// add a new line to the sdp to take care of error
const updatedSignal = {
...data.signalData,
sdp: `${data.signalData.sdp}\n`,
};
this.videoCallParams.receivingCall = true;
this.videoCallParams.caller = data.from;
this.videoCallParams.callerSignal = updatedSignal;
}
});
},
async placeVideoCall(id, name) {
this.callPlaced = true;
this.callPartner = name;
await this.getMediaPermission();
this.videoCallParams.peer1 = new Peer({
initiator: true,
trickle: false,
stream: this.videoCallParams.stream,
config: {
iceServers: [
{
urls: this.turn_url,
username: this.turn_username,
credential: this.turn_credential,
},
],
},
});
this.videoCallParams.peer1.on("signal", (data) => {
// send user call signal
axios
.post("/video/call-user", {
user_to_call: id,
signal_data: data,
from: this.authuserid,
})
.then(() => {})
.catch((error) => {
console.log(error);
});
});
this.videoCallParams.peer1.on("stream", (stream) => {
console.log("call streaming");
if (this.$refs.partnerVideo) {
this.$refs.partnerVideo.srcObject = stream;
}
});
this.videoCallParams.peer1.on("connect", () => {
console.log("peer connected");
});
this.videoCallParams.peer1.on("error", (err) => {
console.log(err);
});
this.videoCallParams.peer1.on("close", () => {
console.log("call closed caller");
});
this.videoCallParams.channel.listen("StartVideoChat", ({ data }) => {
if (data.type === "callAccepted") {
if (data.signal.renegotiate) {
console.log("renegotating");
}
if (data.signal.sdp) {
this.videoCallParams.callAccepted = true;
const updatedSignal = {
...data.signal,
sdp: `${data.signal.sdp}\n`,
};
this.videoCallParams.peer1.signal(updatedSignal);
}
}
});
},
async acceptCall() {
this.callPlaced = true;
this.videoCallParams.callAccepted = true;
await this.getMediaPermission();
this.videoCallParams.peer2 = new Peer({
initiator: false,
trickle: false,
stream: this.videoCallParams.stream,
config: {
iceServers: [
{
urls: this.turn_url,
username: this.turn_username,
credential: this.turn_credential,
},
],
},
});
this.videoCallParams.receivingCall = false;
this.videoCallParams.peer2.on("signal", (data) => {
axios
.post("/video/accept-call", {
signal: data,
to: this.videoCallParams.caller,
})
.then(() => {})
.catch((error) => {
console.log(error);
});
});
this.videoCallParams.peer2.on("stream", (stream) => {
this.videoCallParams.callAccepted = true;
this.$refs.partnerVideo.srcObject = stream;
});
this.videoCallParams.peer2.on("connect", () => {
console.log("peer connected");
this.videoCallParams.callAccepted = true;
});
this.videoCallParams.peer2.on("error", (err) => {
console.log(err);
});
this.videoCallParams.peer2.on("close", () => {
console.log("call closed accepter");
});
this.videoCallParams.peer2.signal(this.videoCallParams.callerSignal);
},
toggleCameraArea() {
if (this.videoCallParams.callAccepted) {
this.isFocusMyself = !this.isFocusMyself;
}
},
getUserOnlineStatus(id) {
const onlineUserIndex = this.videoCallParams.users.findIndex(
(data) => data.id === id
);
if (onlineUserIndex < 0) {
return "Offline";
}
return "Online";
},
declineCall() {
this.videoCallParams.receivingCall = false;
},
toggleMuteAudio() {
if (this.mutedAudio) {
this.$refs.userVideo.srcObject.getAudioTracks()[0].enabled = true;
this.mutedAudio = false;
} else {
this.$refs.userVideo.srcObject.getAudioTracks()[0].enabled = false;
this.mutedAudio = true;
}
},
toggleMuteVideo() {
if (this.mutedVideo) {
this.$refs.userVideo.srcObject.getVideoTracks()[0].enabled = true;
this.mutedVideo = false;
} else {
this.$refs.userVideo.srcObject.getVideoTracks()[0].enabled = false;
this.mutedVideo = true;
}
},
stopStreamedVideo(videoElem) {
const stream = videoElem.srcObject;
const tracks = stream.getTracks();
tracks.forEach((track) => {
track.stop();
});
videoElem.srcObject = null;
},
endCall() {
// if video or audio is muted, enable it so that the stopStreamedVideo method will work
if (!this.mutedVideo) this.toggleMuteVideo();
if (!this.mutedAudio) this.toggleMuteAudio();
this.stopStreamedVideo(this.$refs.userVideo);
if (this.authuserid === this.videoCallParams.caller) {
this.videoCallParams.peer1.destroy();
} else {
this.videoCallParams.peer2.destroy();
}
this.videoCallParams.channel.pusher.channels.channels[
"presence-presence-video-channel"
].disconnect();
setTimeout(() => {
this.callPlaced = false;
}, 3000);
},
},
};
</script>
<style scoped>
#video-row {
width: 700px;
max-width: 90vw;
}
#incoming-call-card {
border: 1px solid #0acf83;
}
.video-container {
width: 700px;
height: 500px;
max-width: 90vw;
max-height: 50vh;
margin: 0 auto;
border: 1px solid #0acf83;
position: relative;
box-shadow: 1px 1px 11px #9e9e9e;
background-color: #fff;
}
.video-container .user-video {
width: 30%;
position: absolute;
left: 10px;
bottom: 10px;
border: 1px solid #fff;
border-radius: 6px;
z-index: 2;
}
.video-container .partner-video {
width: 100%;
height: 100%;
position: absolute;
left: 0;
right: 0;
bottom: 0;
top: 0;
z-index: 1;
margin: 0;
padding: 0;
}
.video-container .action-btns {
position: absolute;
bottom: 20px;
left: 50%;
margin-left: -50px;
z-index: 3;
display: flex;
flex-direction: row;
}
/* Mobiel Styles */
@media only screen and (max-width: 768px) {
.video-container {
height: 50vh;
}
}
</style>
Breakdown of the video-chat component.
- We import
Peerfromsimple-peerwhich is the package that makes interacting with webrtc easier for us. The component accepts the following props:
allusers: All registered users excluding the currently authenticated user. These users will be displayed. We don't want to permit the authenticated user to call oneself.authuserid: Theidof the authenticated user.turn_url: The URL of your turn server to be used in an instance ofsimple-peeri.ePeer.turn_username: Username from TURN Server.turn_credential: The password for the turn_username.When the component is mounted we subscribe to the
presence-video-channelwith theinitializeChannelmethod. We useLaravel-echofor that.We
initializeCallListenerson the channel we subscribed to. There are methods provided byLaravel-echoto know how many users have subscribed to the channel, users who are joining and users leaving the channel. We also listen to theStartVideoChatevent on thepresence-video-channelfor incoming calls.We list all the users in the database from the
allUsersprop and indicate whether they are online or not. Online means they have also subscribed to thepresence-video-channel. This will take effect on whichever page you place thevideo-chatcomponent. In this tutorial, we have a video-chat page where we place the component.placeVideoCallis used to make a call. We pass theidandnameof the user being called as parameters.
We ask the user to grant the browser access to the microphone and camera withgetMediaPermissionmethod. The streaming data is displayed in the browser. The caller now sees their face in the browser.
We create a Peer for the caller. When there is a signalling event,peer.on('signal',..)we send the signalling data to the/video/call-userendpoint on our backend.
The recipient receives the incoming call notification and when they accept the call, we signal the caller with the caller with ananswersignal.
Thepeer.on('stream',...)listener receives the streaming data which is displayed on the recipients part in the browser.acceptCallmethod is used to accept an incoming call. When a user sees an incoming call notification, they click on the accept button. We signal the receiver with the signal data received from the caller.
We get permission to access the camera and microphone and display the streaming data on our UI.
This creates a second instance of thePeerwith theinitiatorproperty set tofalseto indicate that the new Peer is a receiver.
We hit the accept-call endpoint and send our signalling data (an answer) to the caller.
When the streaming starts, we display the caller's stream in the browser as well and now communication continues without hitting our backend but through the websocket powered by pusher.
- The remaining functions are used for muting audio, disable video stream and to end the call.

- Register the
VideoChat.vuecomponent inresources/js/app.js
Vue.component("video-chat", require("./components/VideoChat.vue").default);
- Create the video chat view in
resources/views/video-chat.blade.php
@extends('layouts.app')

@section('content')
    <video-chat :allusers="{{ $users }}" :authUserId="{{ auth()->id() }}" turn_url="{{ env('TURN_SERVER_URL') }}"
        turn_username="{{ env('TURN_SERVER_USERNAME') }}" turn_credential="{{ env('TURN_SERVER_CREDENTIAL') }}" />
@endsection
- Update env variables. Insert your Pusher API keys
BROADCAST_DRIVER=pusher

PUSHER_APP_ID=
PUSHER_APP_KEY=
PUSHER_APP_SECRET=
PUSHER_APP_CLUSTER=

TURN_SERVER_URL=
TURN_SERVER_USERNAME=
TURN_SERVER_CREDENTIAL=
Credits
I found a lot of resources beneficial which I cannot share all over here, but the following YouTube videos helped in my understanding and arriving at this implementation.
I'd like to hear your thoughts about how easy it is to follow through with this article.
Update
I just published a Live streaming implementation with WebRTC. Check it out over here:

Subscribe to:
Comments (Atom)